
Cutout, also known as image masking, is a technique used in image composition and is one of the core functions of Photoshop. It can help photographers remove backgrounds or any unwanted foreground objects from an image and blend the subject with a new background to create a composite image.
Selection#
Selection refers to the chosen area. The pixel distribution of a photo is very diverse, and the objects in the photo also have their own areas. The concept of selection allows us to isolate specific pixels or specific objects to perform subsequent applications.
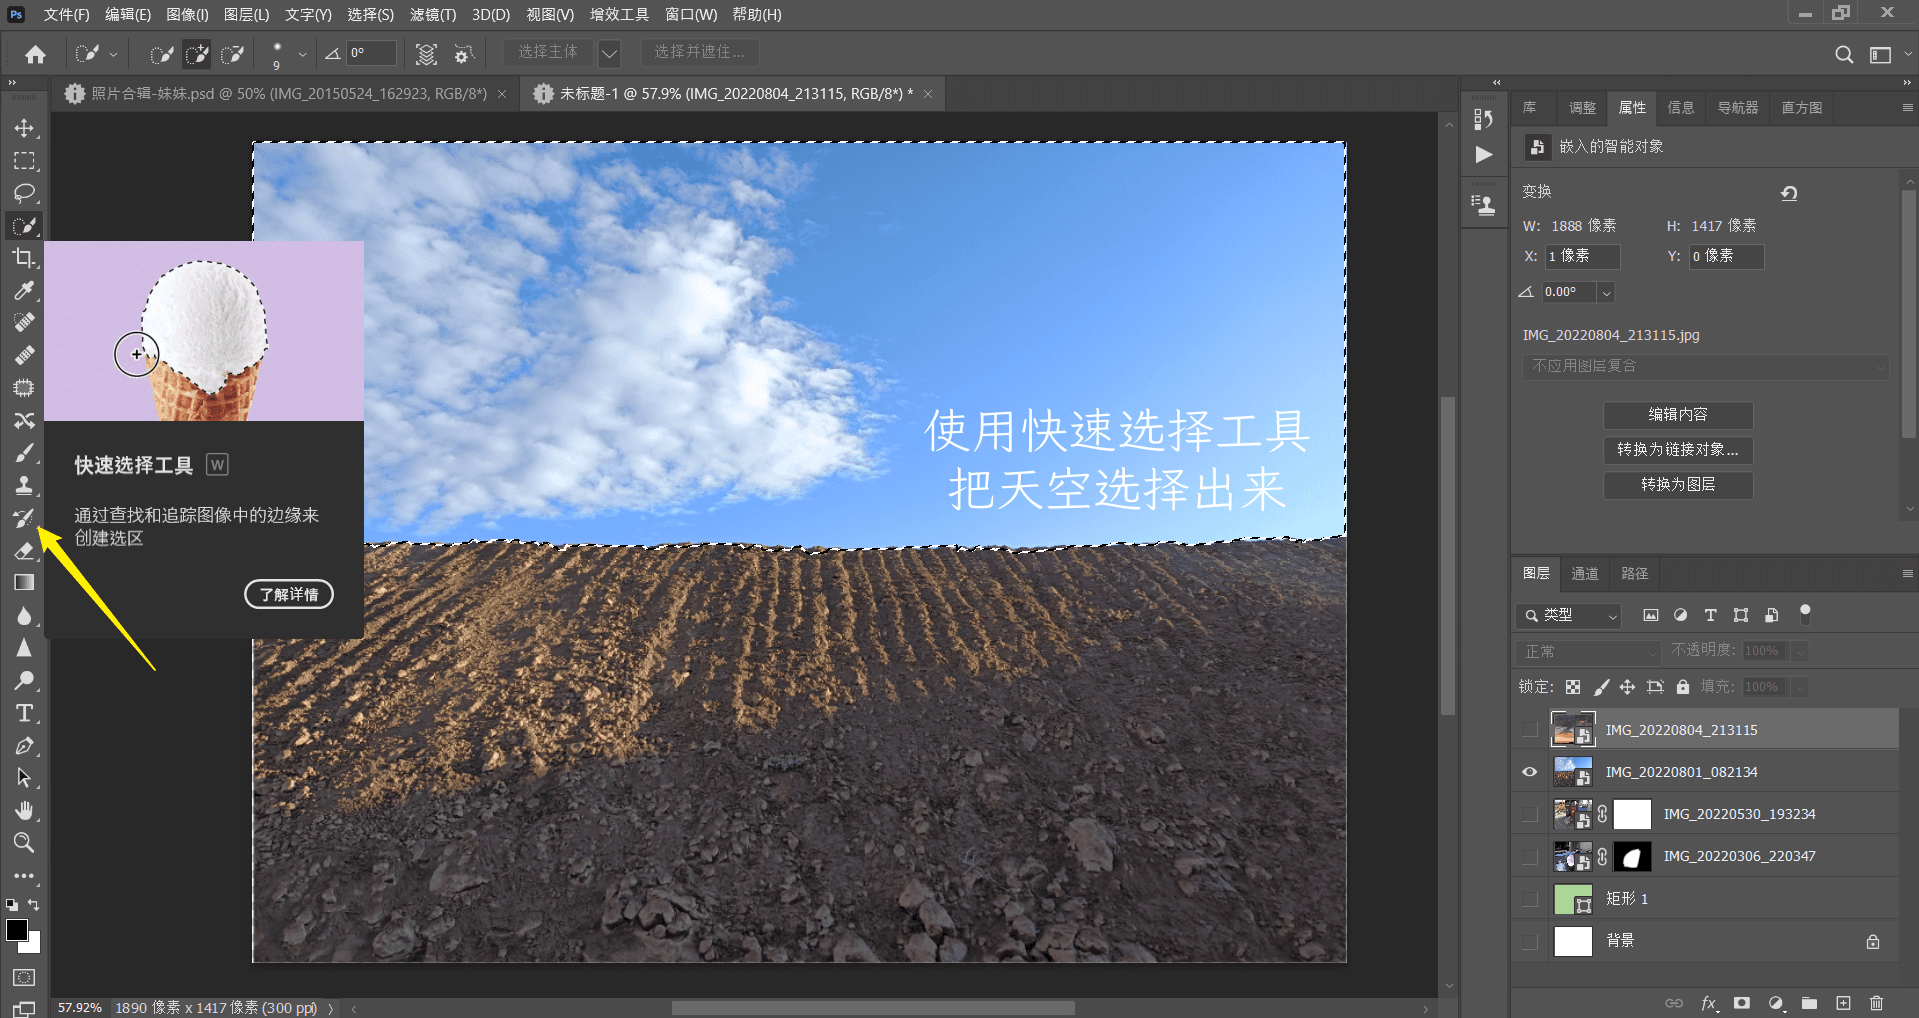
When creating a selection, we choose individual objects, and selection lines, often referred to as marching ants, appear around the selected objects. For example, in the photo shown below, we want to adjust the sky, which requires the assistance of a selection. Only by creating a selection can we make separate adjustments to the objects inside and outside the selection.
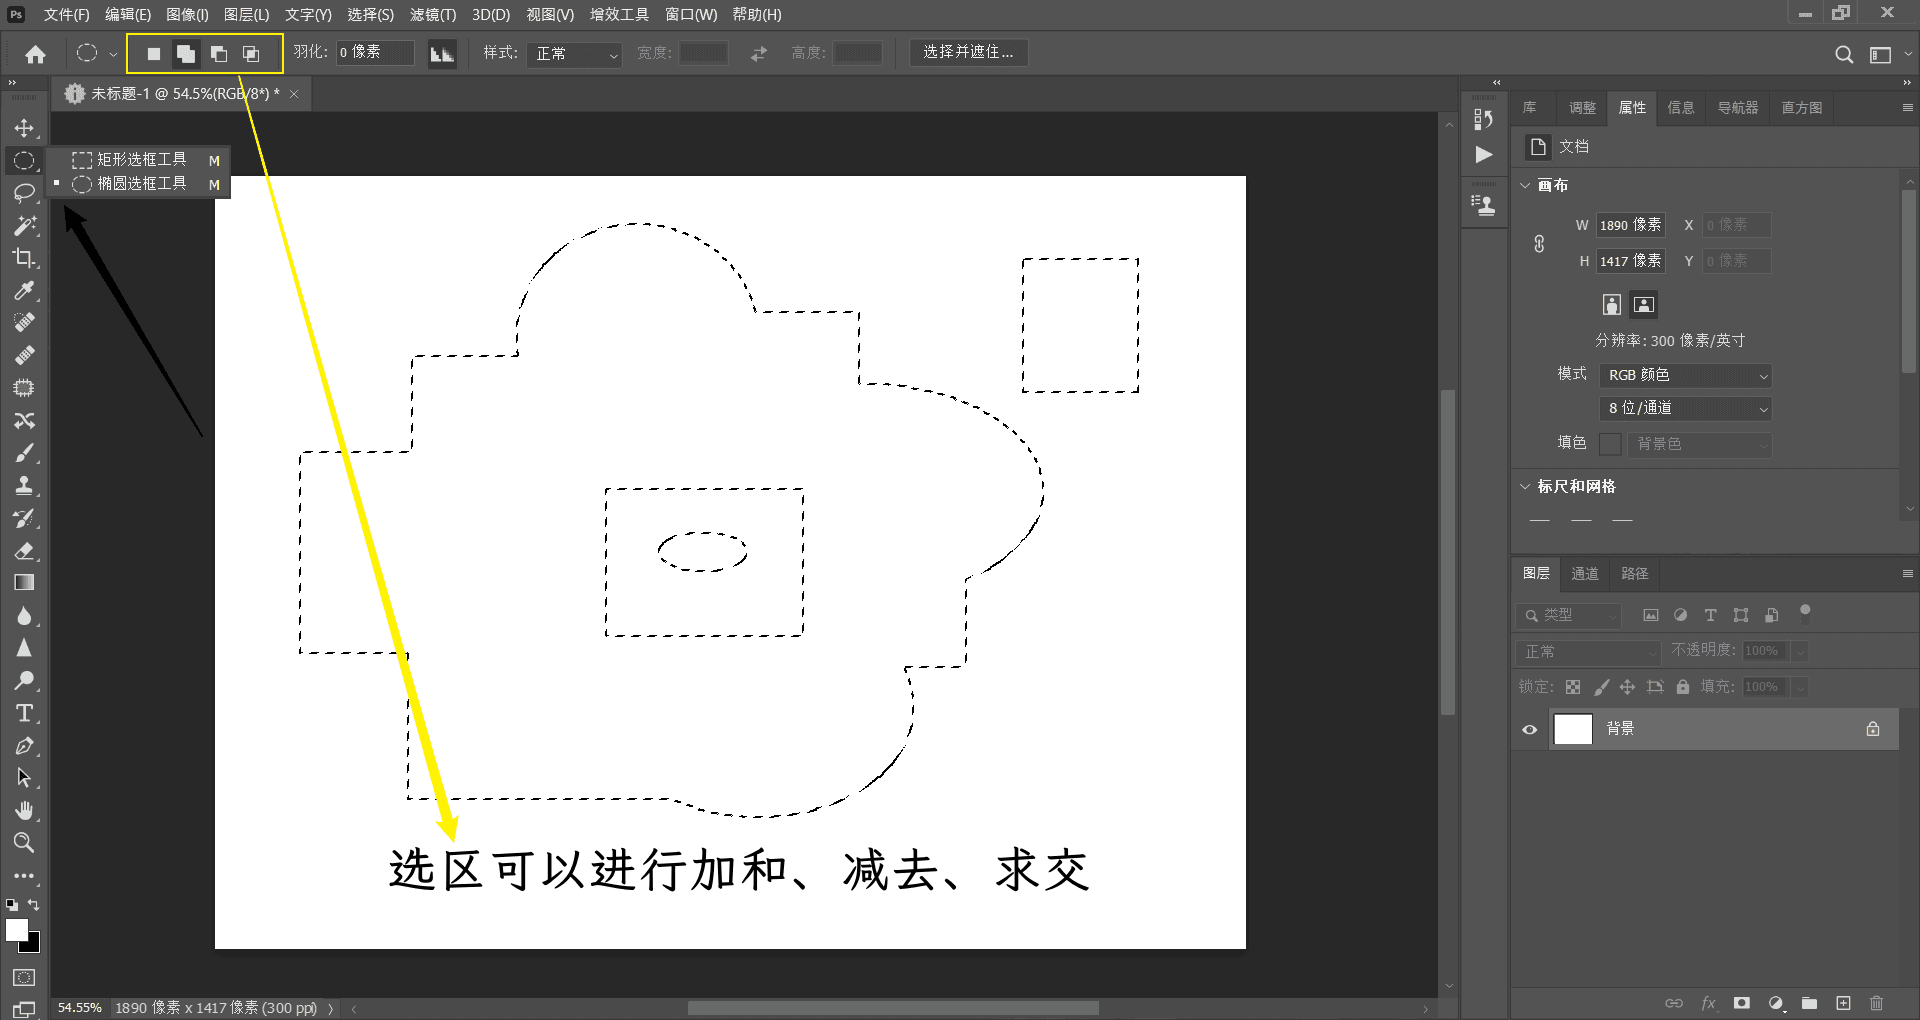
Selections can be added, subtracted, or intersected (i.e., Boolean operations).
Use of Selection 1: Local Adjustments#
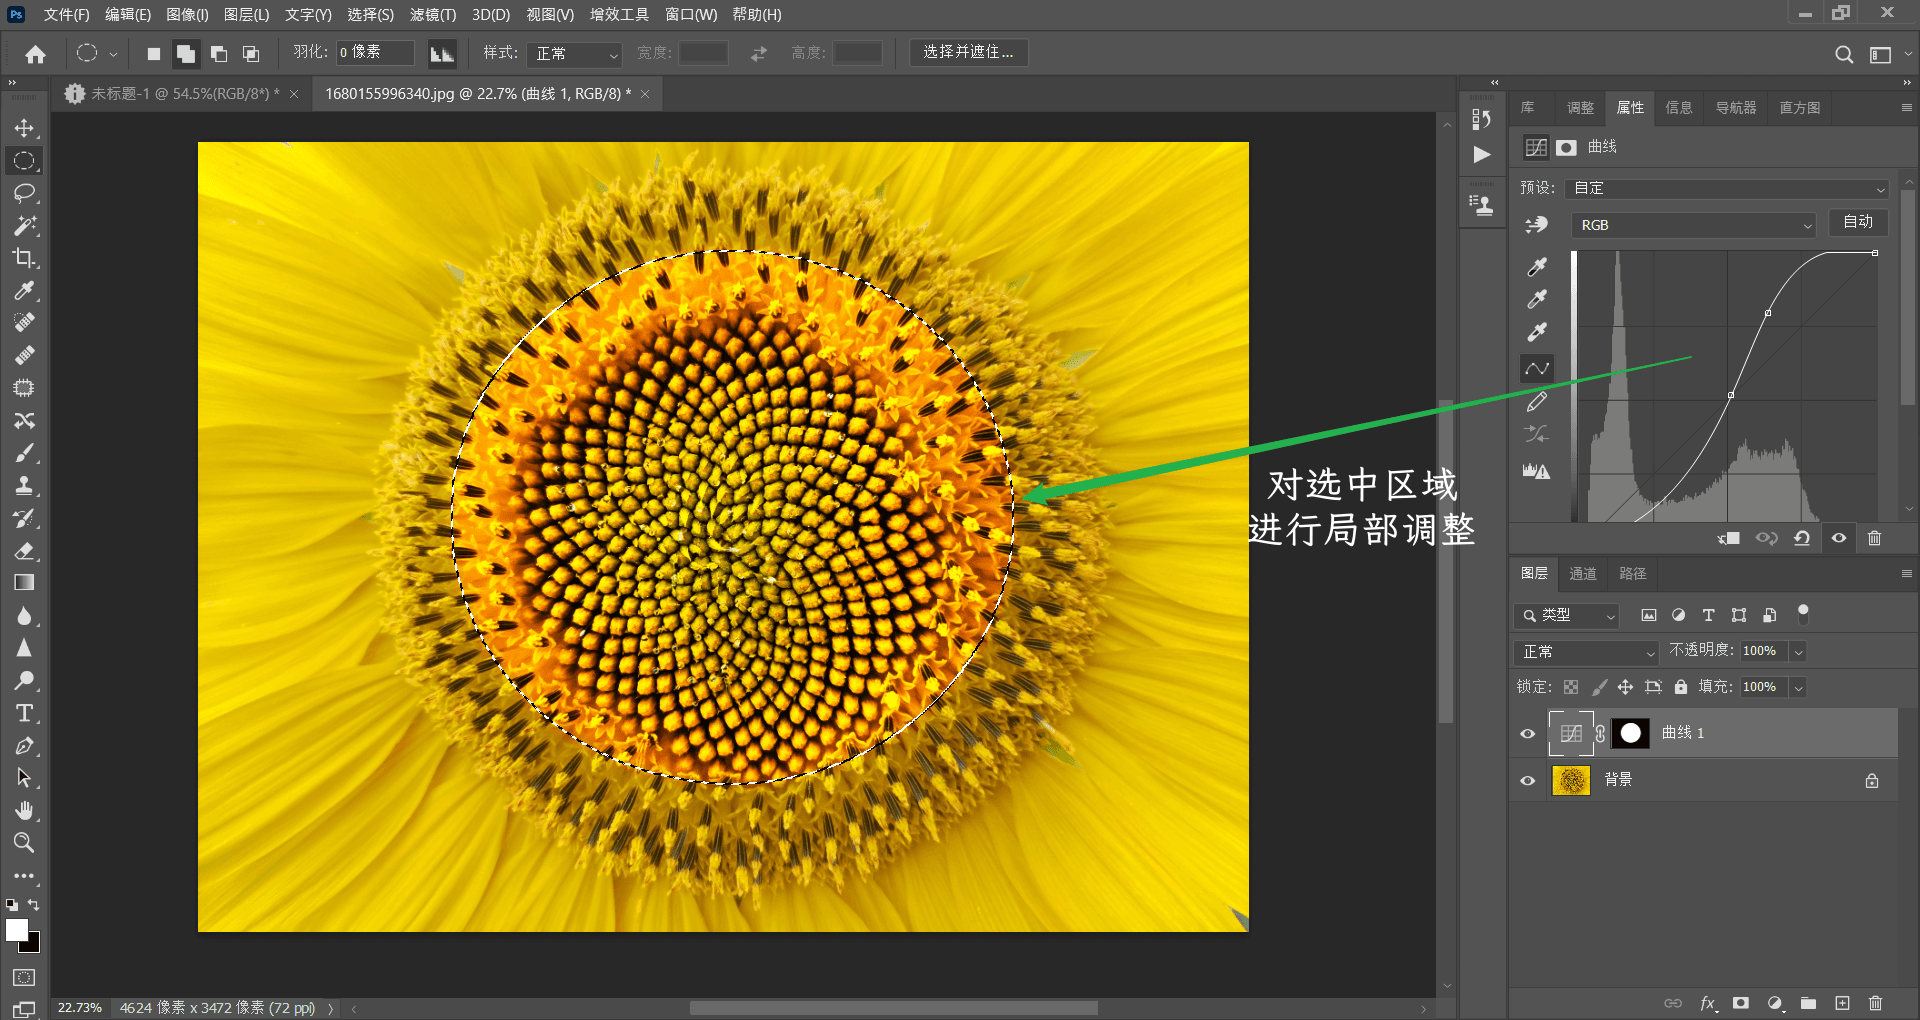
In fact, there are two purposes for creating selections in certain positions of an image. The first purpose is to make local adjustments. The so-called local refers to the inside of the selection. For example, if we have selected the center of a flower, we can click the "Create a new fill or adjustment layer" button at the bottom of the "Layers" panel and select the "Curves" option in the pop-up menu, as shown in the figure below. By adjusting the feathering appropriately, we can make local adjustments naturally.
Use of Selection 2: Composition#
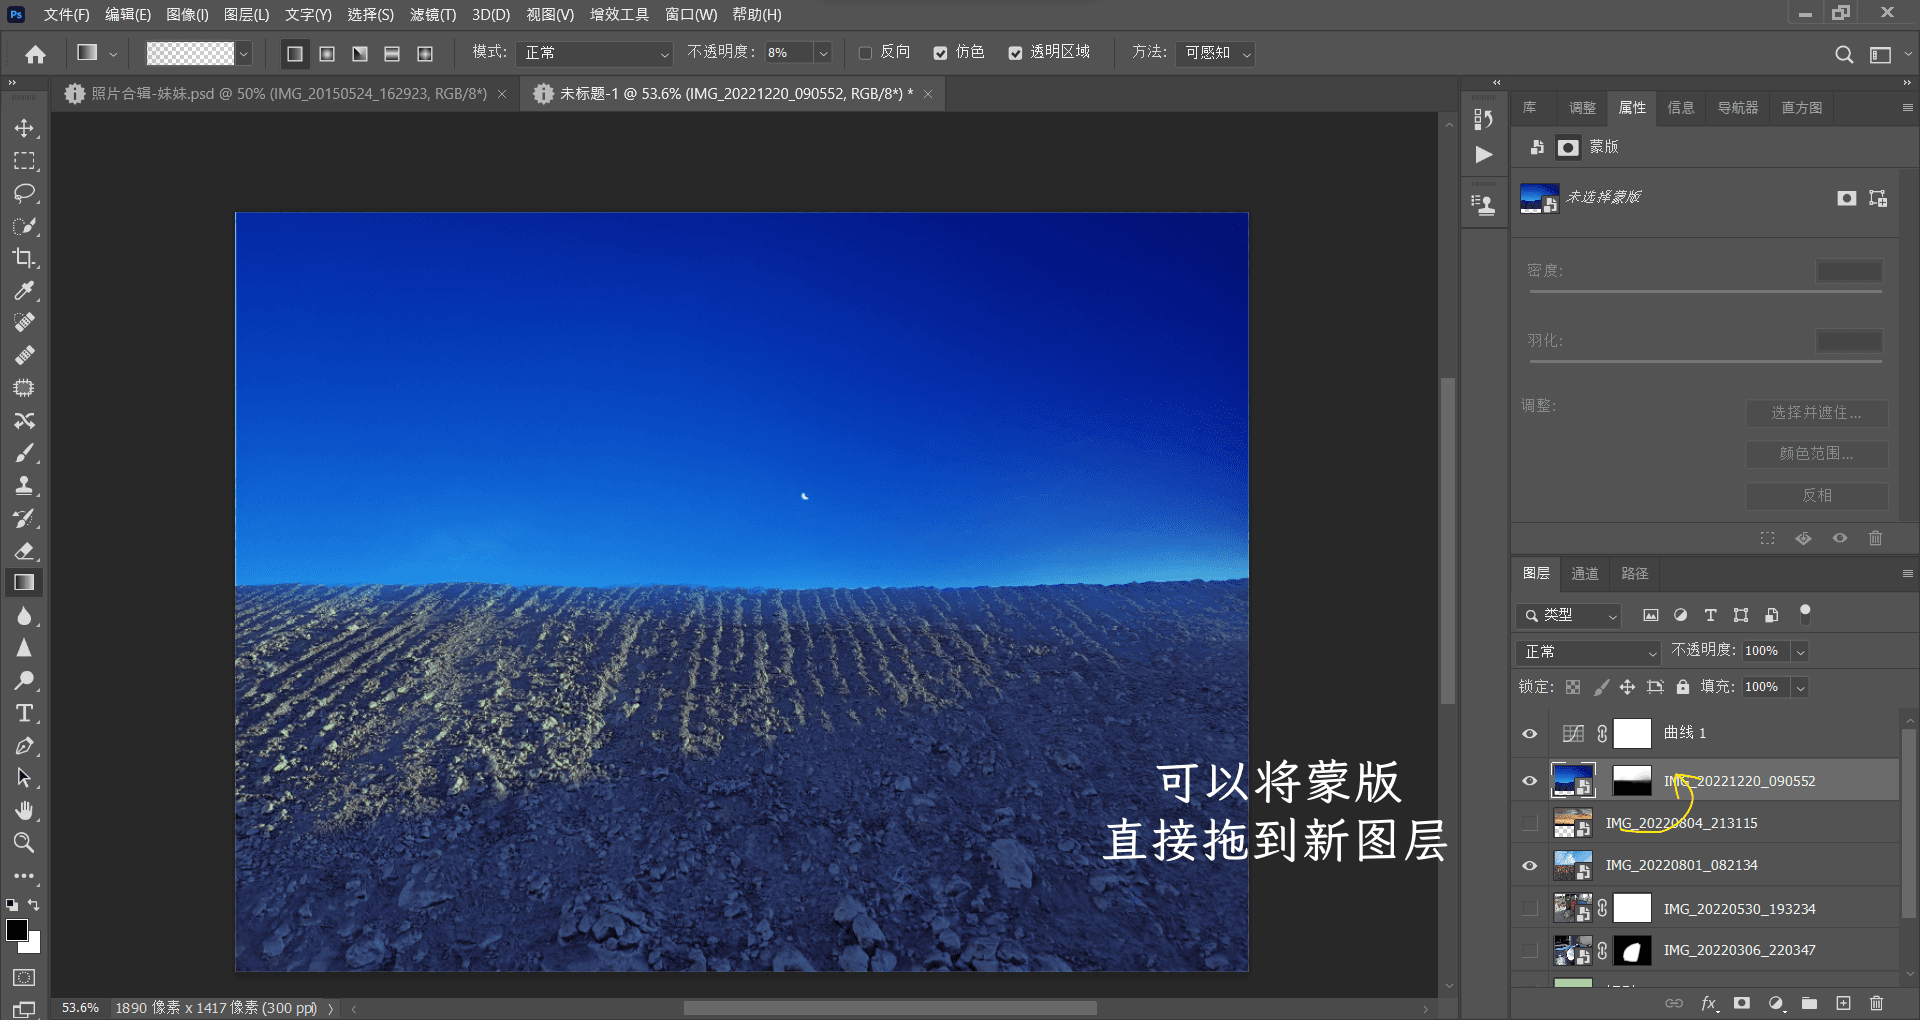
By creating a clipping mask with a selection, we can blend different images. Let's take an example using an image of a hillside for composition.
First, use the Quick Selection tool to select the sky:
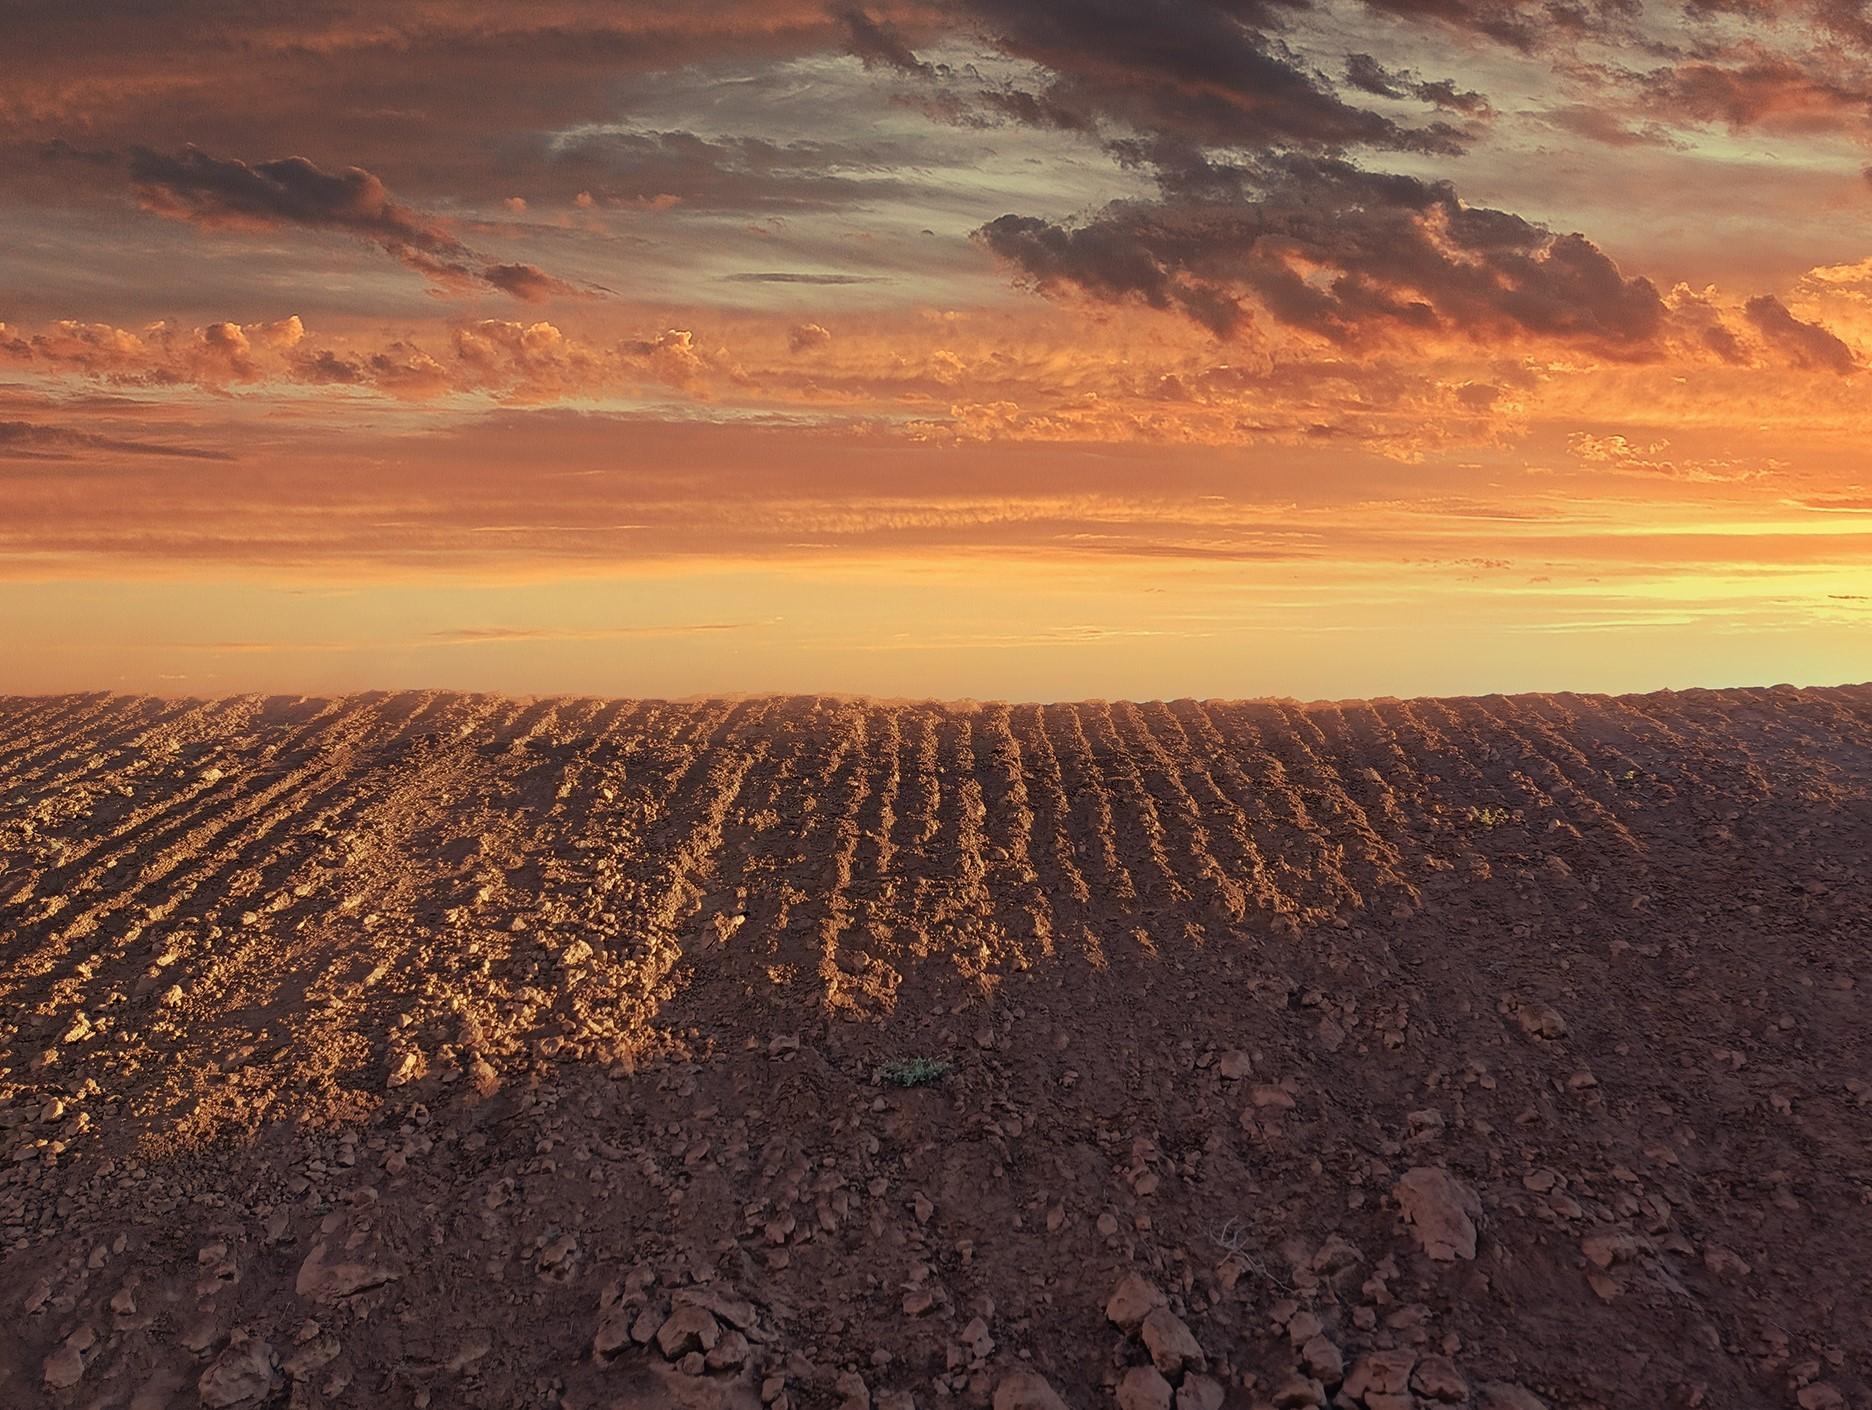
Then display the target layer (in this case, a sunset image) and click "Add to Mask":

Note: After unlocking the layer and mask, you can adjust the layer. Here, the cloud layer is fine-tuned to simulate the angle of real lighting (otherwise it would look too fake).
In addition, you can quickly change other target composite layers by dragging the mask.
The 50% gray principle of selection: Under an opacity of less than 50%, the selection is not visible, or in other words, it is invisible. Although the selection is invisible, it does not mean that it does not exist. 50% is the threshold for the selection to be displayed.[^1]
Feathering#
After creating a selection for the first time, we often find that the edges of the selection are very sharp, and the lines are too harsh. Therefore, no matter whether it is adjustment or composition, the final effect will not look natural. This problem can be solved by feathering the selection. Feathering refers to making the edges of the selection softer and the transition between the outside and inside of the selection smoother.
Two Types of Feathering#
After creating a selection, we made some brightness adjustments to the photo using the "Feather" function. However, in actual operation, you can set the feather value before creating the selection. For example, after selecting the "Rectangular Marquee Tool" in the toolbar, set the "Feather" value to "150 pixels" in the options bar above, and then create a selection in the photo. At this time, the edges of the selection will become softer. In this way, even if you make adjustments to the selection, after deselecting, the transition between the adjusted and unadjusted parts will still be relatively smooth.
One thing to note is that once we have created a selection without setting the feather value, if we want to feather it later, we can only use the right-click menu to feather it and set the feather value. Once a selection is created, setting the feather value in the options bar will have no effect. This is because the parameter settings in the options bar are for the corresponding tools in the toolbar on the left, not for the selection. To adjust the selection, you need to use the "Feather" command in the context menu!
Below is the feathering of the corresponding tool: When no feather value is set, the adjustment to a small area is like this: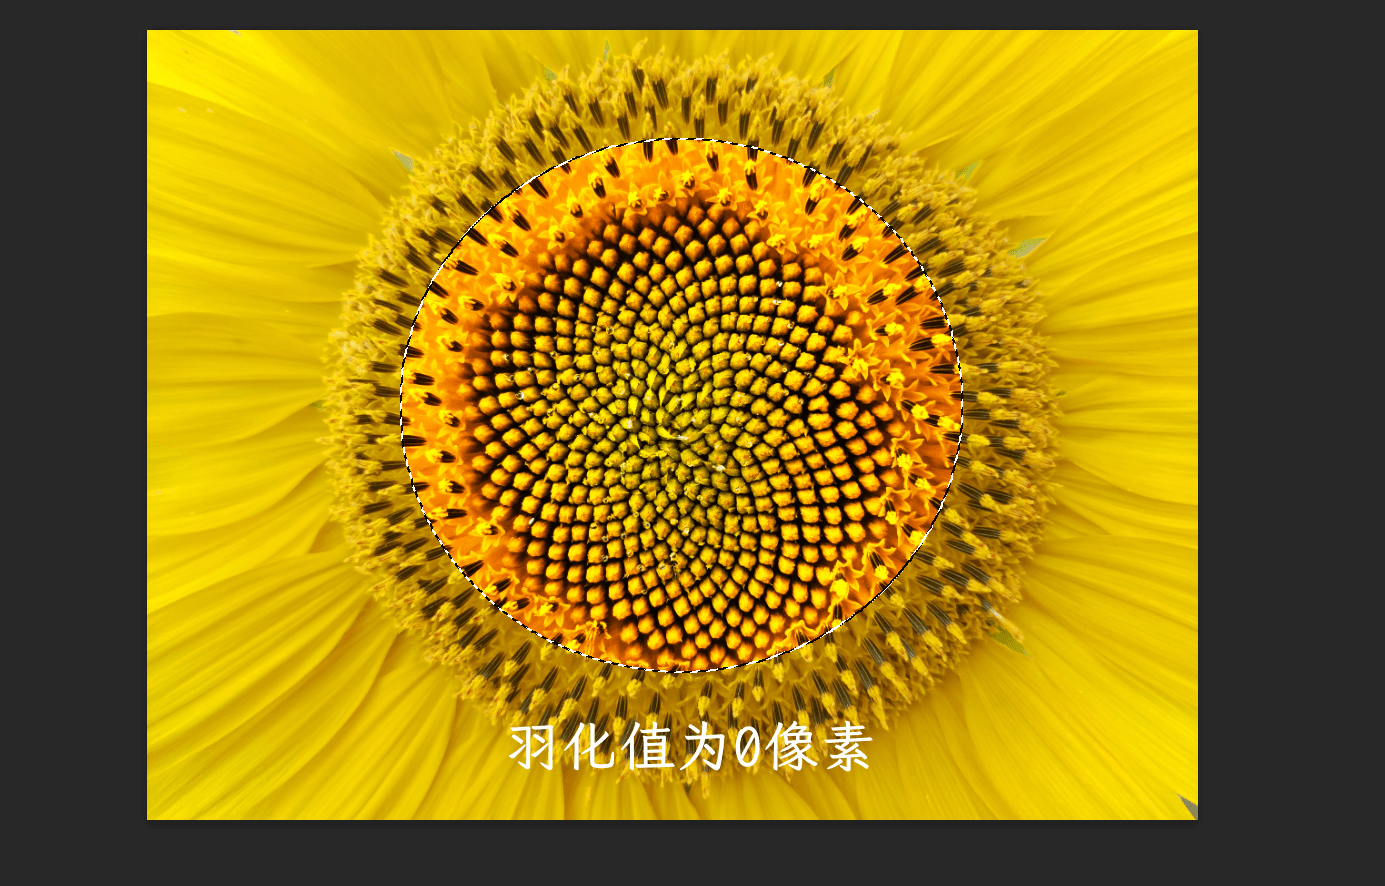
After setting a certain feather value:

As you can see, we have a more natural transition for small local adjustments🎉.
⭐ Edge Refinement#
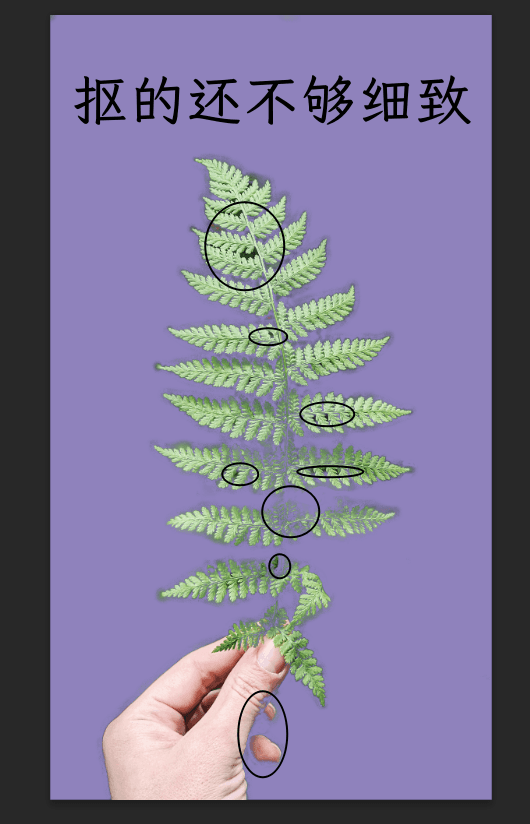
Edge refinement of a selection involves two important aspects: adding or refining the selection for missed or excess areas, and making precise adjustments to the selection. This is also a core function of Photoshop. Here's an example:
First, select the approximate part of the subject:
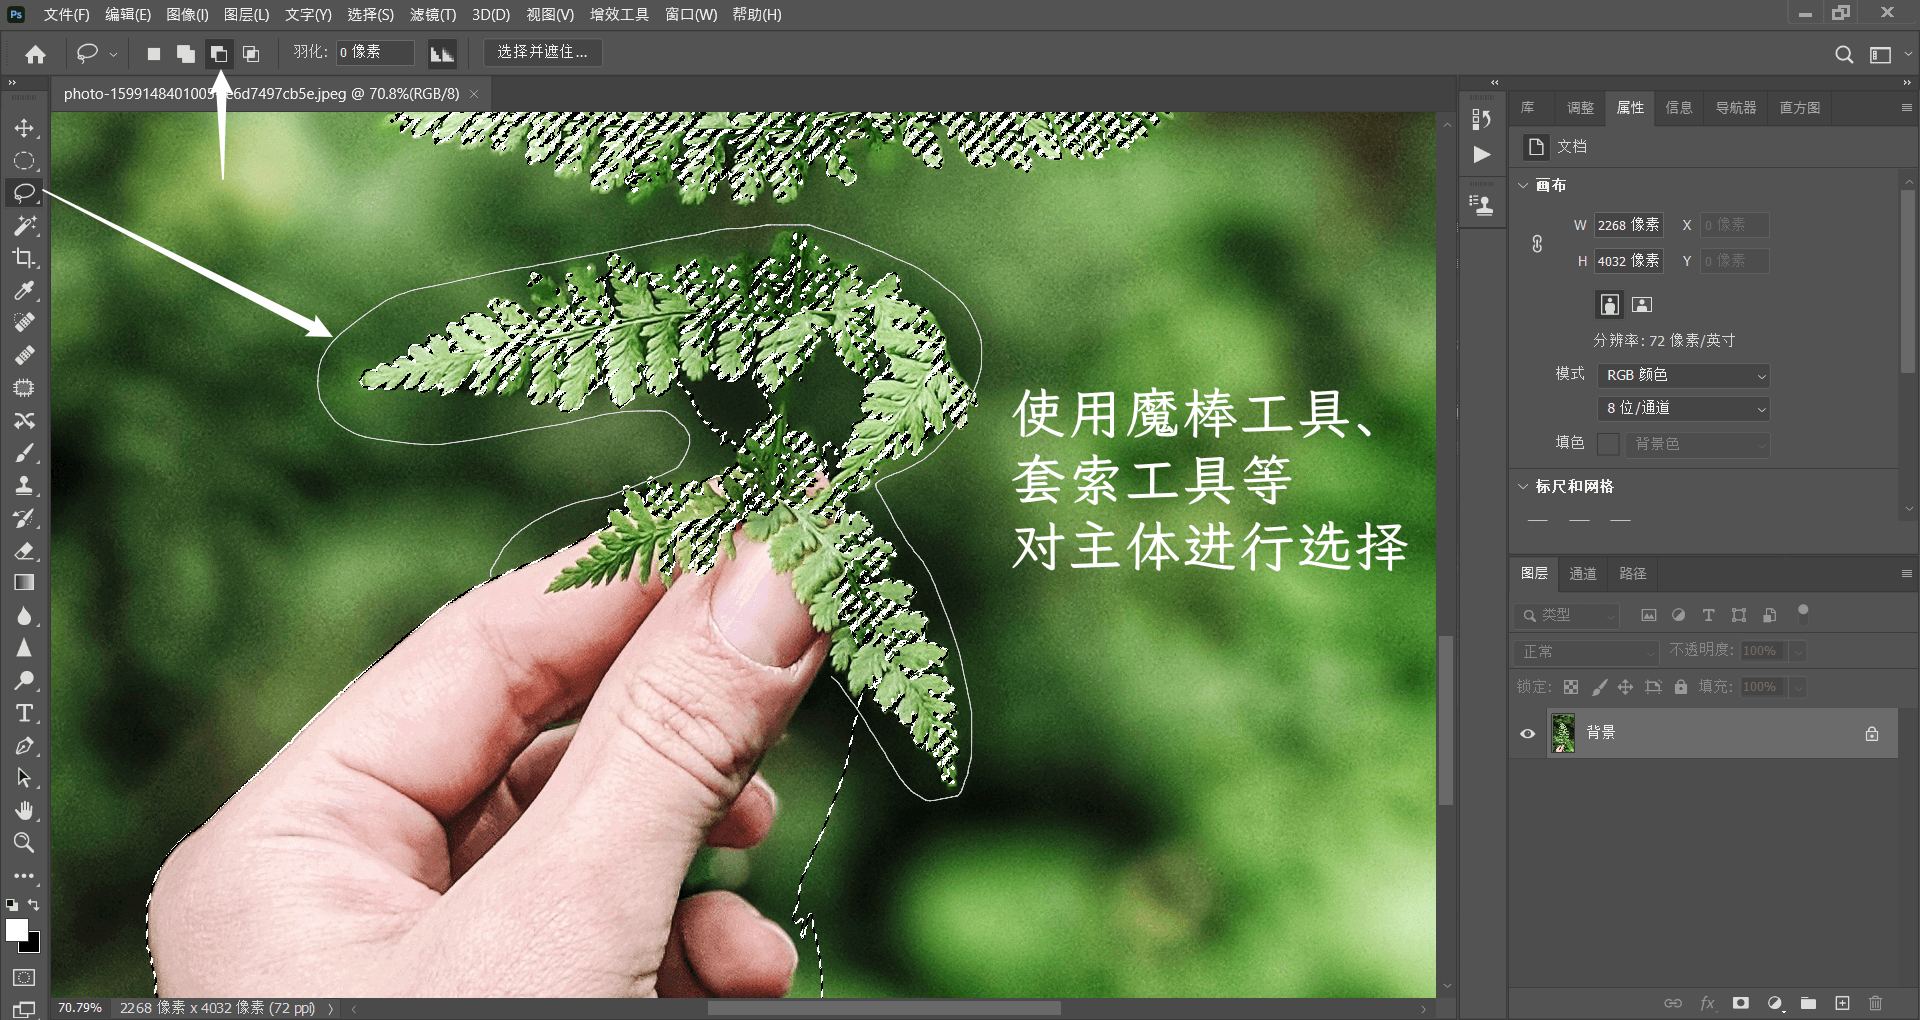
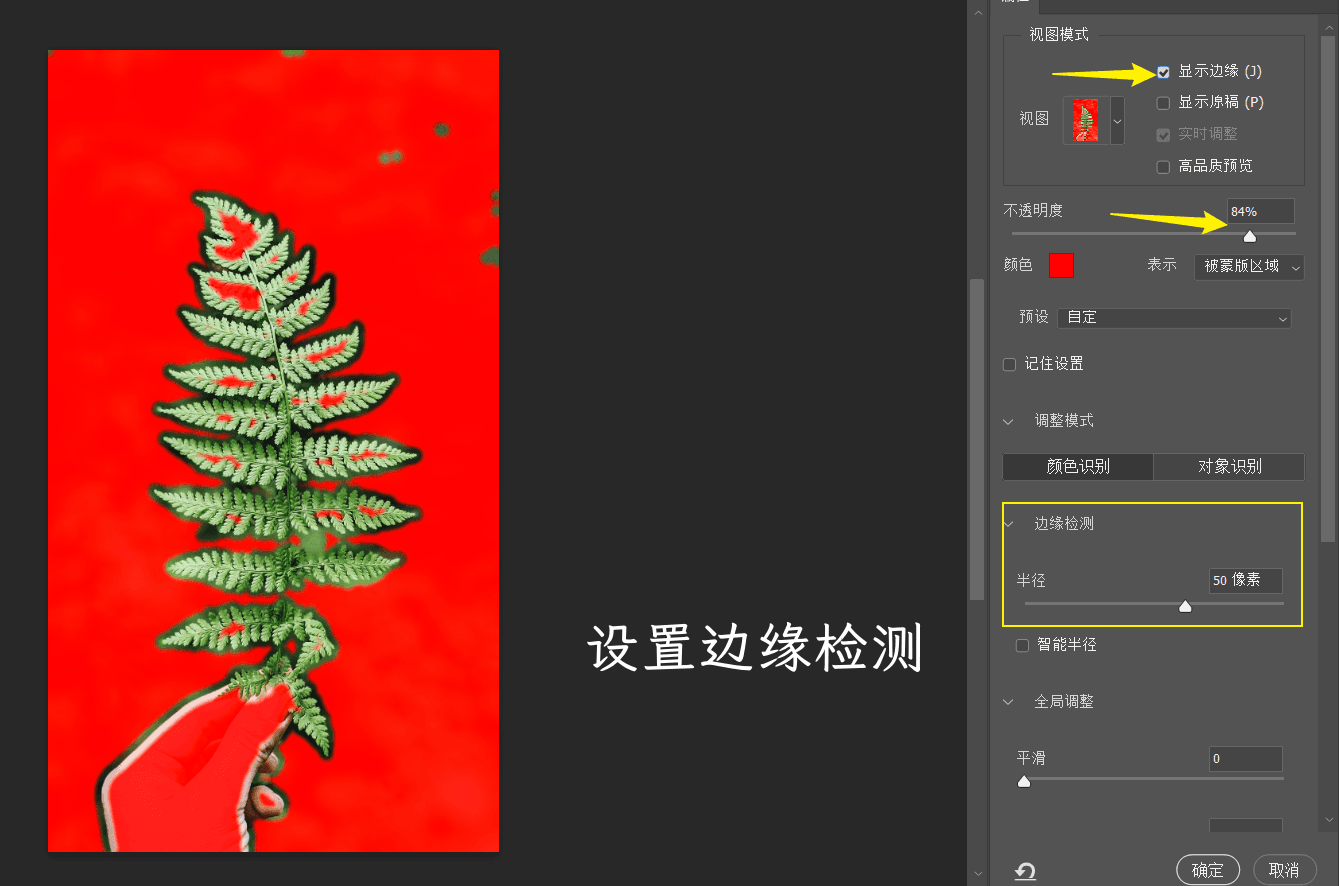
Next, make some fine adjustments to the parts that are not accurate enough. Because it is no longer possible to use the add or subtract function for very quick selection adjustments, we need to fine-tune the selection. After creating an approximate selection, you can directly click the "Select and Mask" button in the options bar, or right-click inside the selection and choose the "Select and Mask" option in the pop-up context menu. Both methods are the same.


How to Perform Cutout?#
In post-processing, there are various methods available for image cropping, including manual selection, magnetic lasso tool, and pen tool. The most accurate and versatile method is to use the pen tool, which involves drawing custom paths around the edges and creating a vector mask to separate the subject from the background. Although this method requires practice and patience, it produces the best results for complex images with rich edge details.
After completing the cutout, you can further refine the edges, adjust contrast and color balance, and apply filters and effects to the subject and background. You can also blend multiple layers or images to create a harmonious composition that conveys a specific emotion or tells a story.
Below is an introduction to cutout using selection tools:
These tools are characterized by their ability to quickly establish selections around the target subject and then fine-tune them through Boolean operations, making them suitable for most images.
Another point to note: Each tool has its unique advantages. Do not form a stereotype about a certain tool just because of a bad experience. You should learn humbly, find a good textbook or teacher, become proficient, and then make good use of their respective advantages (a gentleman is not biased, but makes good use of everything).
Magic Wand Tool#
The Magic Wand tool performs cutout by detecting color similarity. You can understand this tool from the perspective of a histogram.
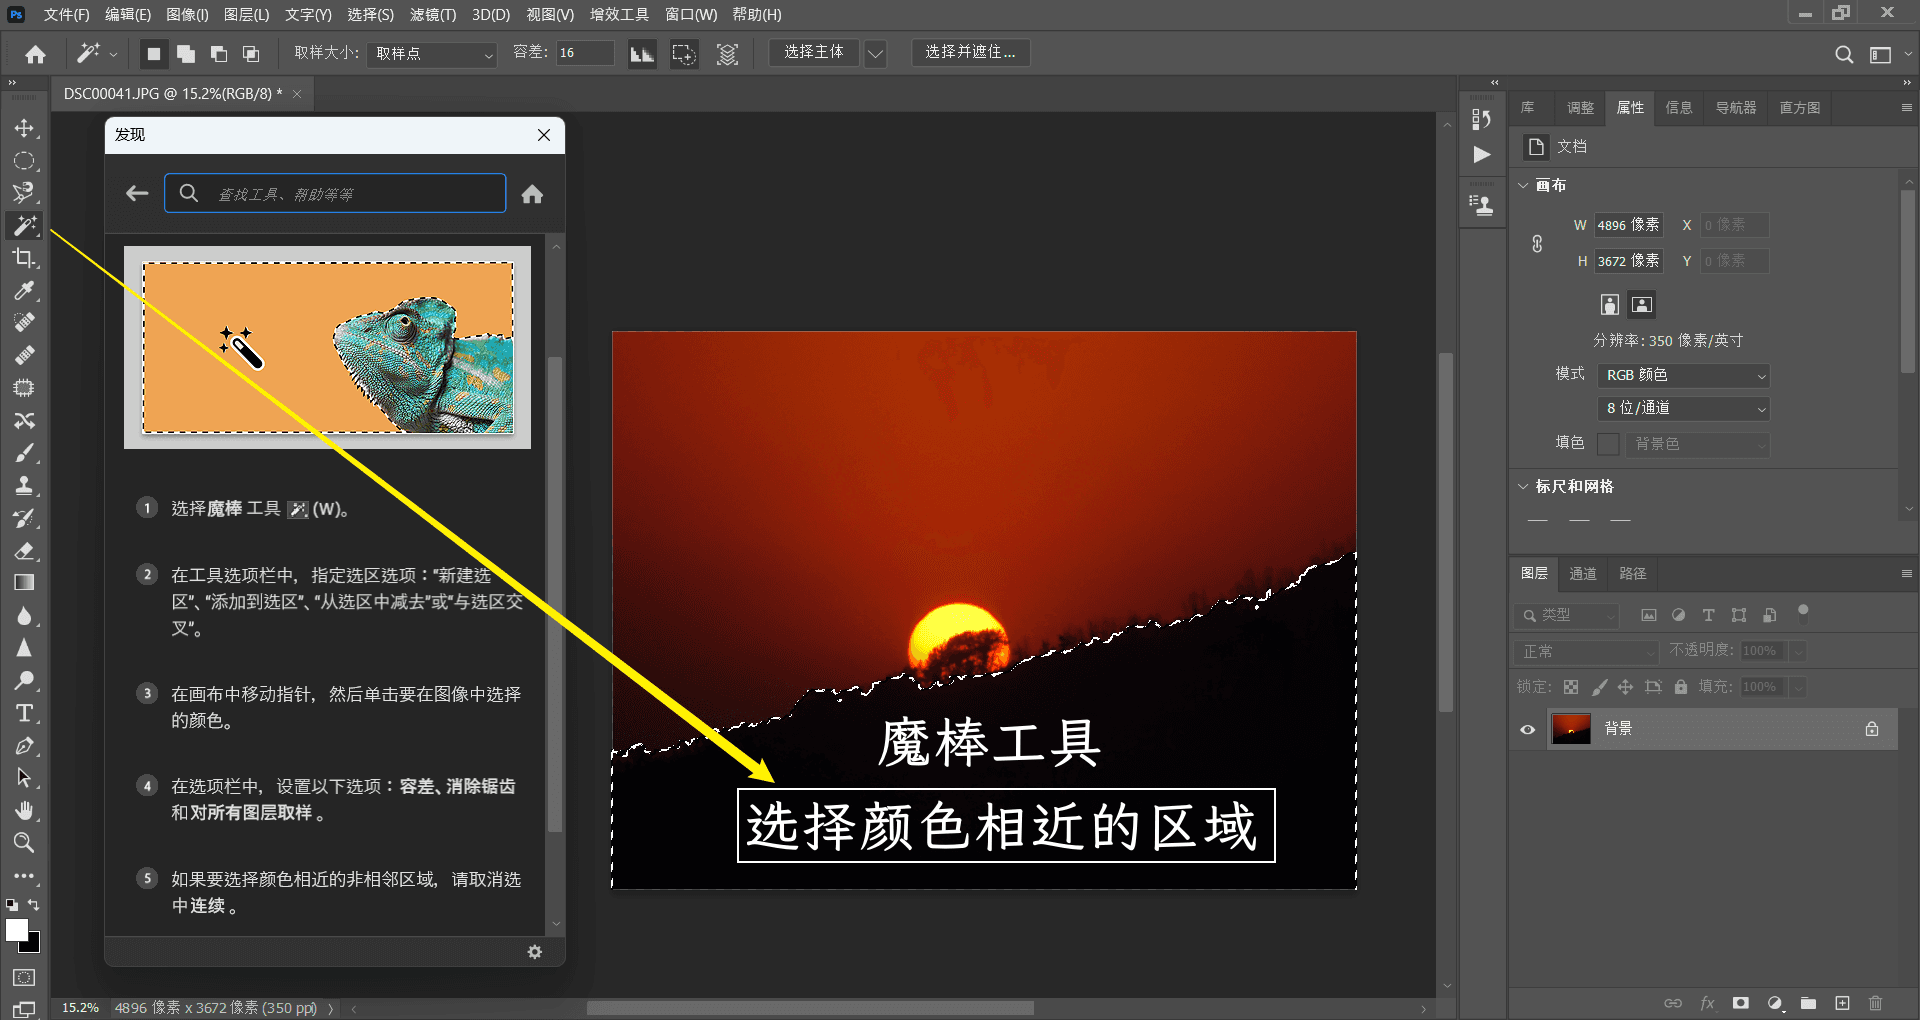
The main parameter of this tool is "Tolerance". "Tolerance" refers to the brightness range detected when creating a selection. If we set the "Tolerance" to 1, only pixels with a brightness range of 0-2 will be included when we click at the mouse position as a sampling point. This range is very small, so when you drag to create a selection, the range of the selection that can be created at one time is very small.
Quick Selection Tool#
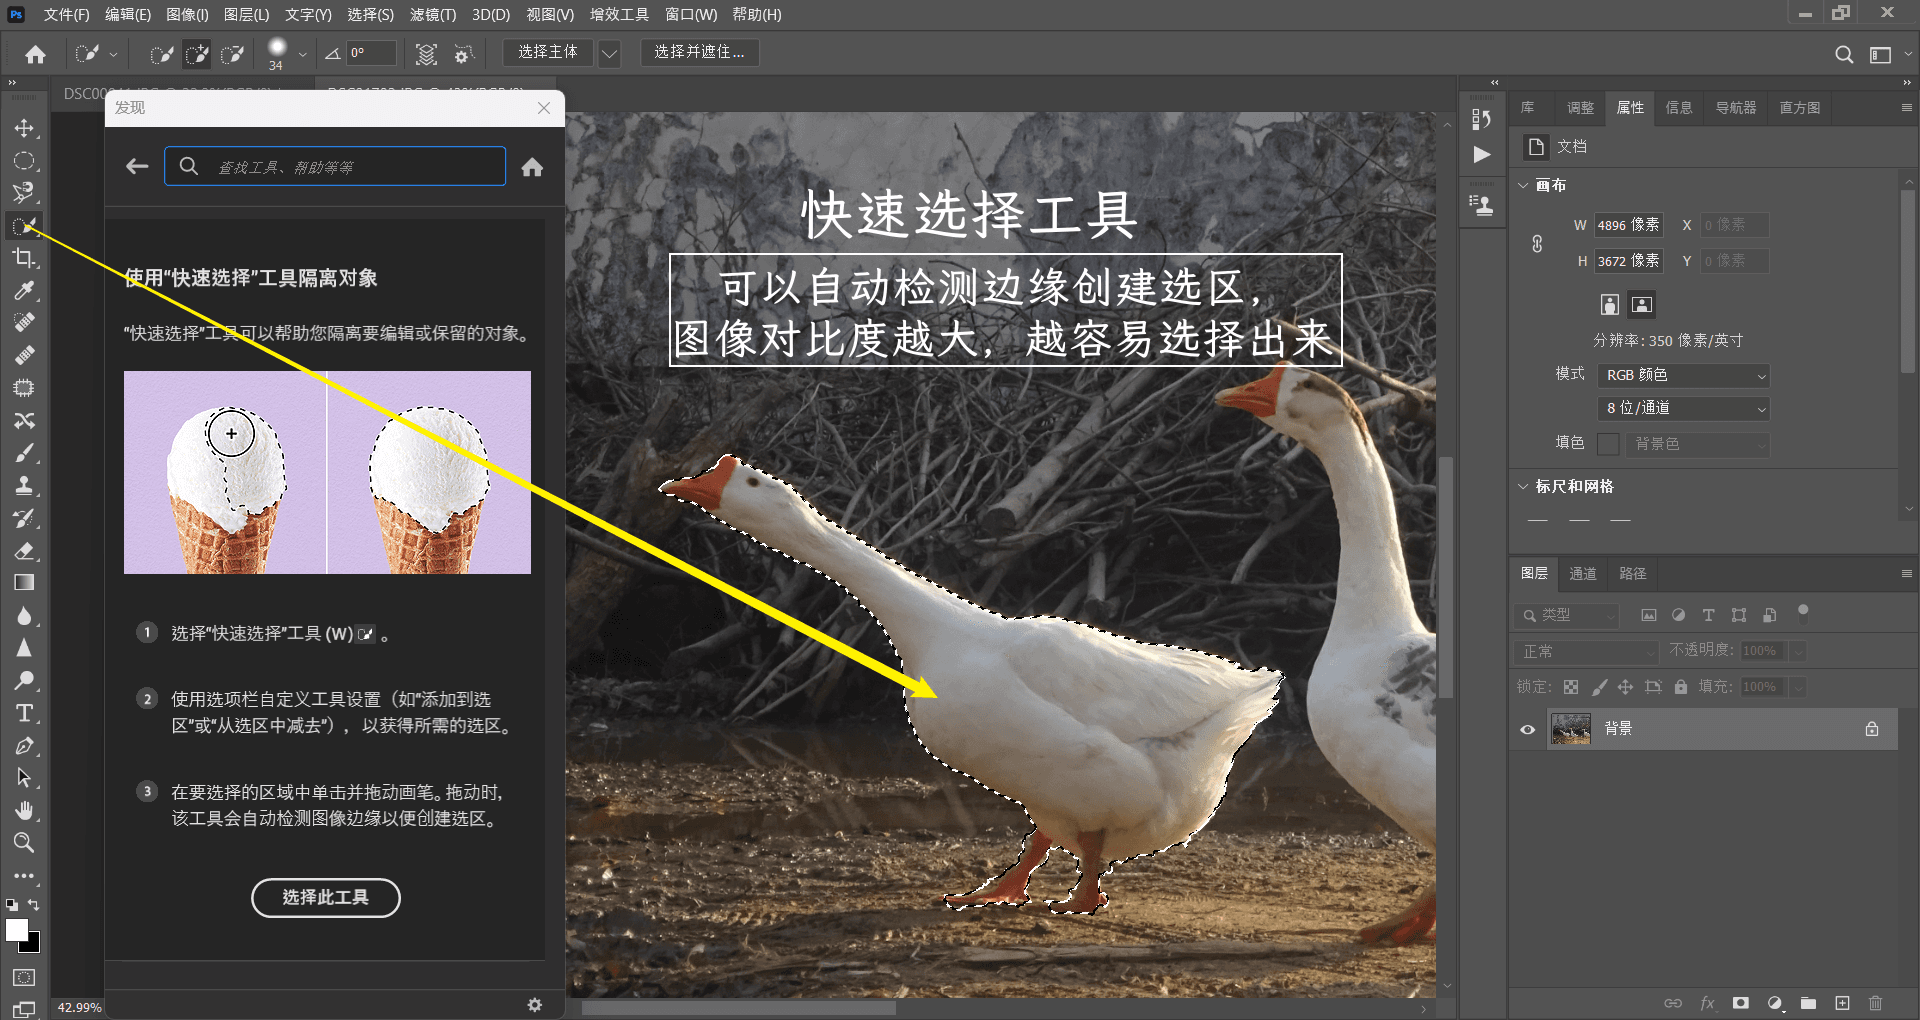
Remember to enable "Auto-Enhance Selection Edges" to make the Quick Selection tool smarter.
Object Selection Tool#

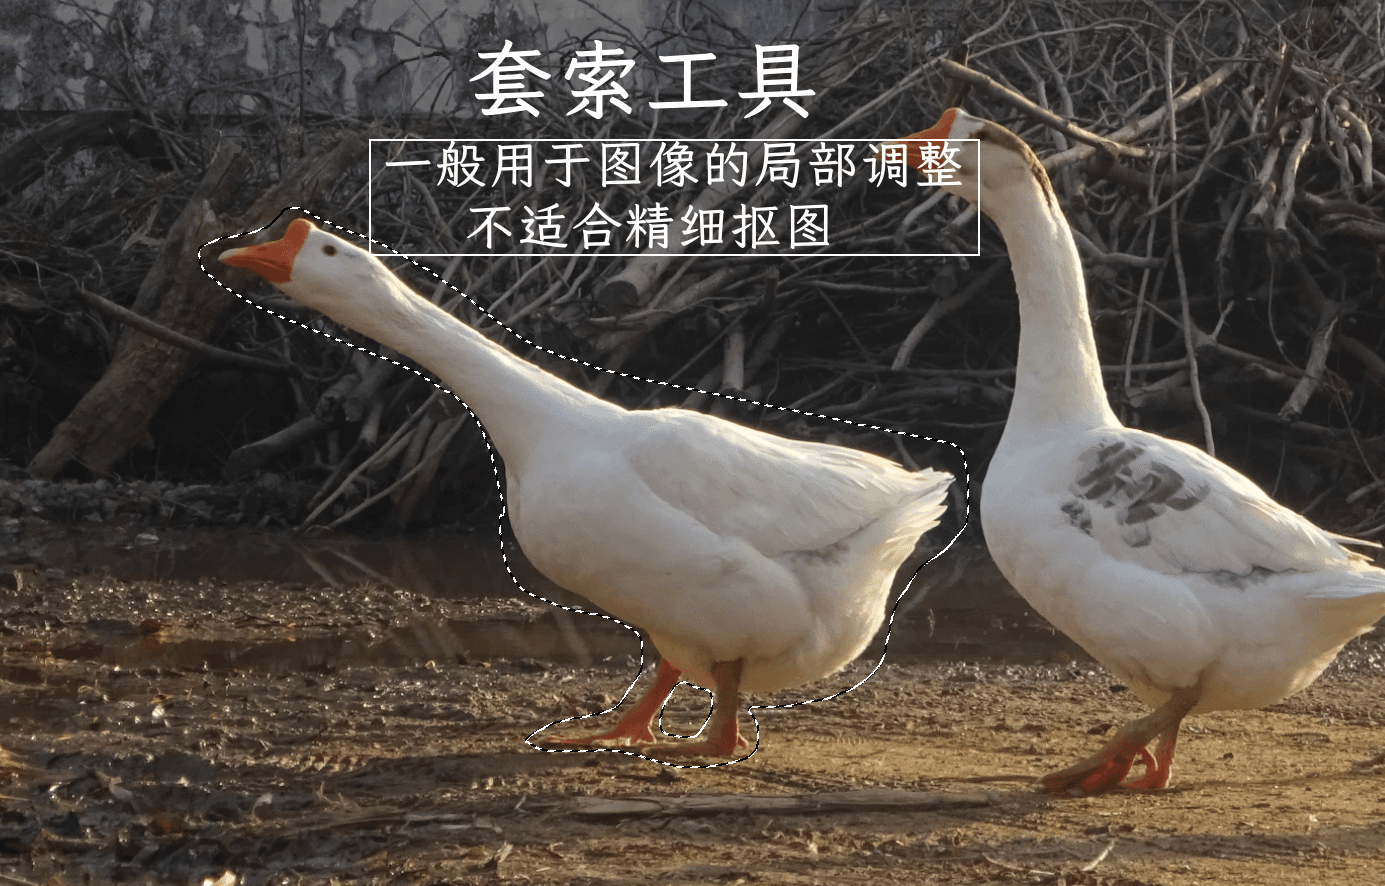
Irregular Geometric Selection Tools (Lasso Tools)#
This type of tool is divided into three types: Lasso, Polygonal Lasso, and Magnetic Lasso. The first two have low accuracy and are difficult to operate, but they are useful for local adjustments and are not suitable for precise cutouts.
Let's use these three white geese as an example:
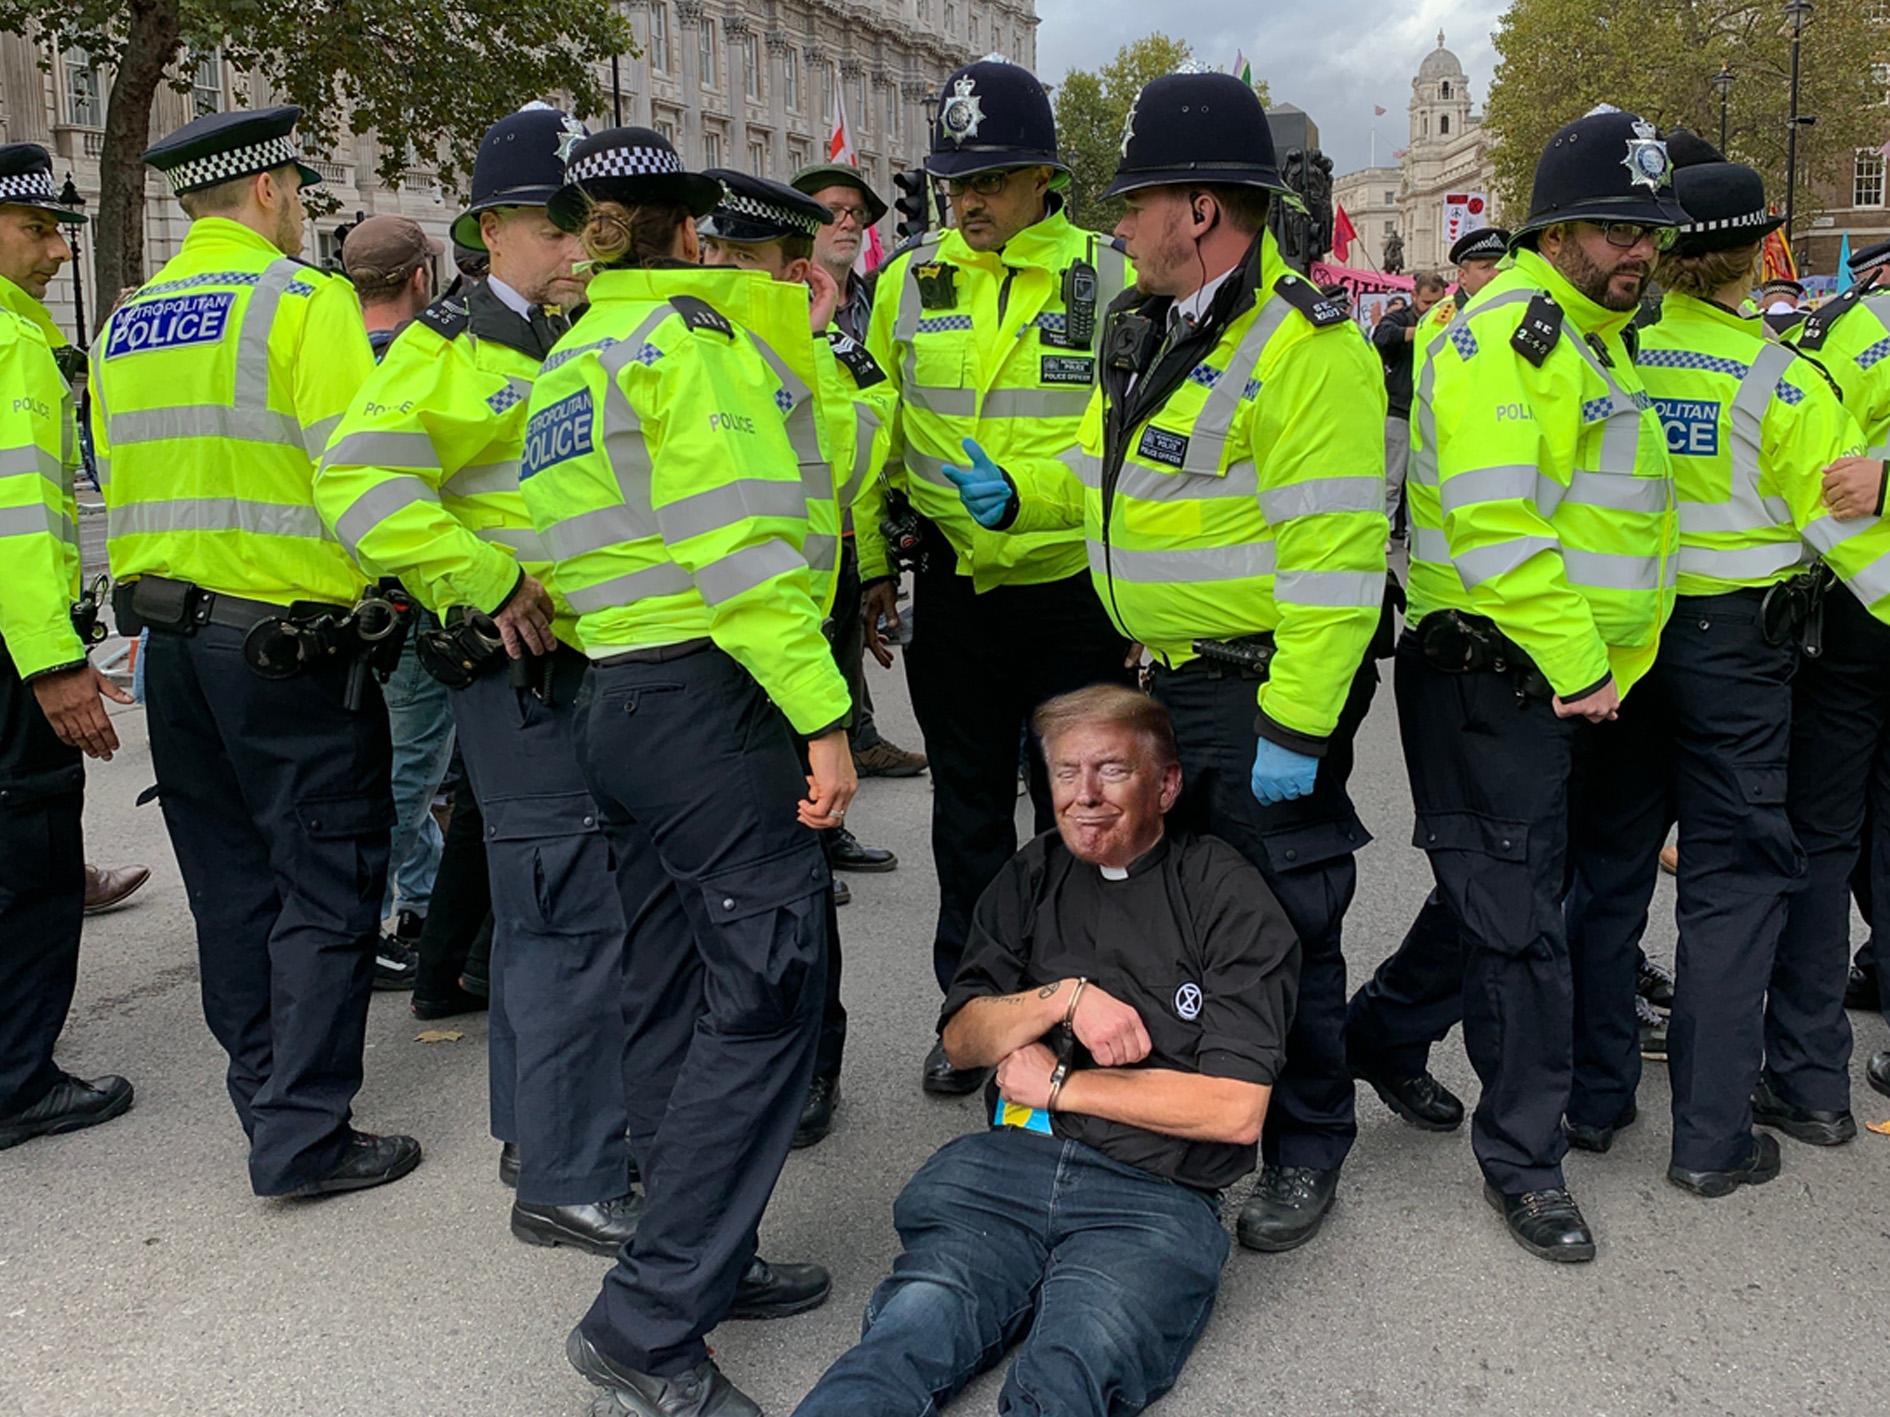
This type of selection can easily adjust the color around the subject, and simple curve adjustments can achieve the effect of "Arrests"🕶.
The third type of irregular geometric selection tool is the Magnetic Lasso tool. This tool is quite interesting. It mainly relies on the software to automatically determine the edges of objects and then automatically create selection lines to establish the final selection. This operation is automatic, so it often has certain limitations. For example, if the part where the selection line is to be created does not have sufficient contrast, the Magnetic Lasso tool cannot recognize the edge or create a selection. In other words, the Magnetic Lasso tool has a high requirement for contrast, and it can only detect edges with very obvious contrast on both sides of the line.
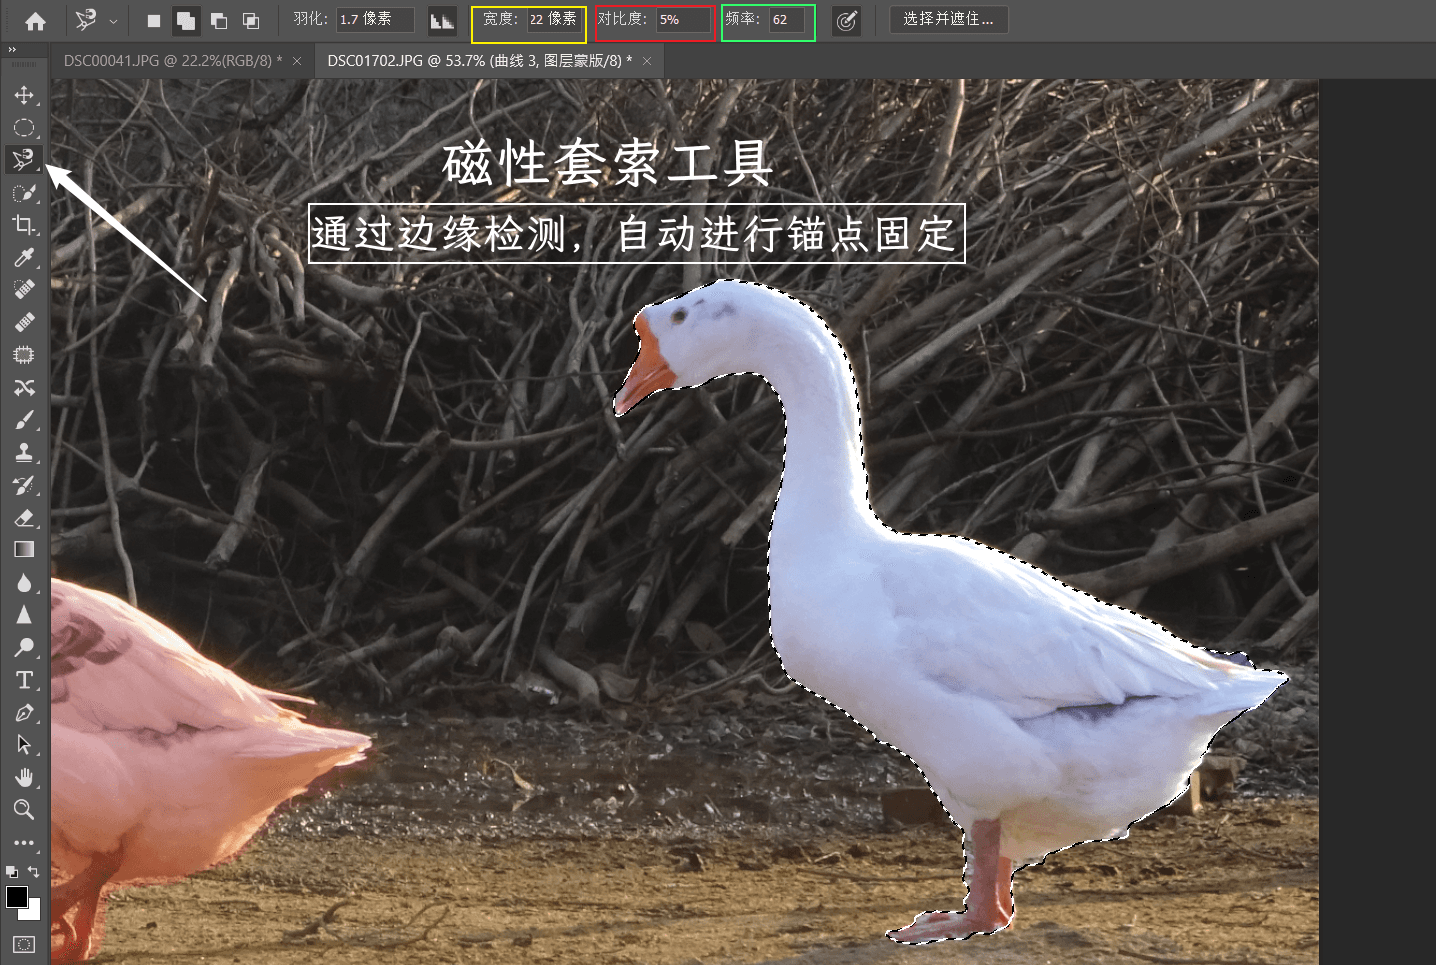
We can adjust the tool by controlling three parameters: Width, Contrast, and Frequency[^3].
- "Width": This parameter refers to the pixel width on both sides of the mouse movement position[^2]. It means that the software detects whether there are obvious line edges within a range of 10 pixels on both sides of the mouse.
- If this value is very small and we place the mouse far away from the edge, the software will not be able to detect the edge in the far position and cannot establish an accurate selection line.
- If "Width" is set to "100 pixels", which means a very large detection range, even if we move the mouse in a position far away from the object, the software can still detect the edge and establish a selection line along the edge.
- There is a new problem here. Is it better to set "Width" as large as possible? Actually, no. If "Width" is set too large, the software may detect other lines in the far distance, and establish selection lines in some positions where we do not want them.
- "Contrast": This parameter determines the accuracy of the Magnetic Lasso tool in recognizing edges. By adjusting it appropriately, it can recognize edges with low contrast and improve its calculation ability. When "Contrast" is set to a very small value (e.g., 2%), the selection can recognize edges with very low contrast and establish accurate outlines, which is extremely useful.
- "Frequency": Determines the frequency of anchor point creation. Generally speaking, the higher the "Frequency", the easier it is to detect edges with low contrast.
Mask Cutout#
To be completed
(Advanced) Channel Precise Cutout#
To be completed
(Advanced) Color Range Cutout#
To be completed
Application of Cutout: Image Composition#
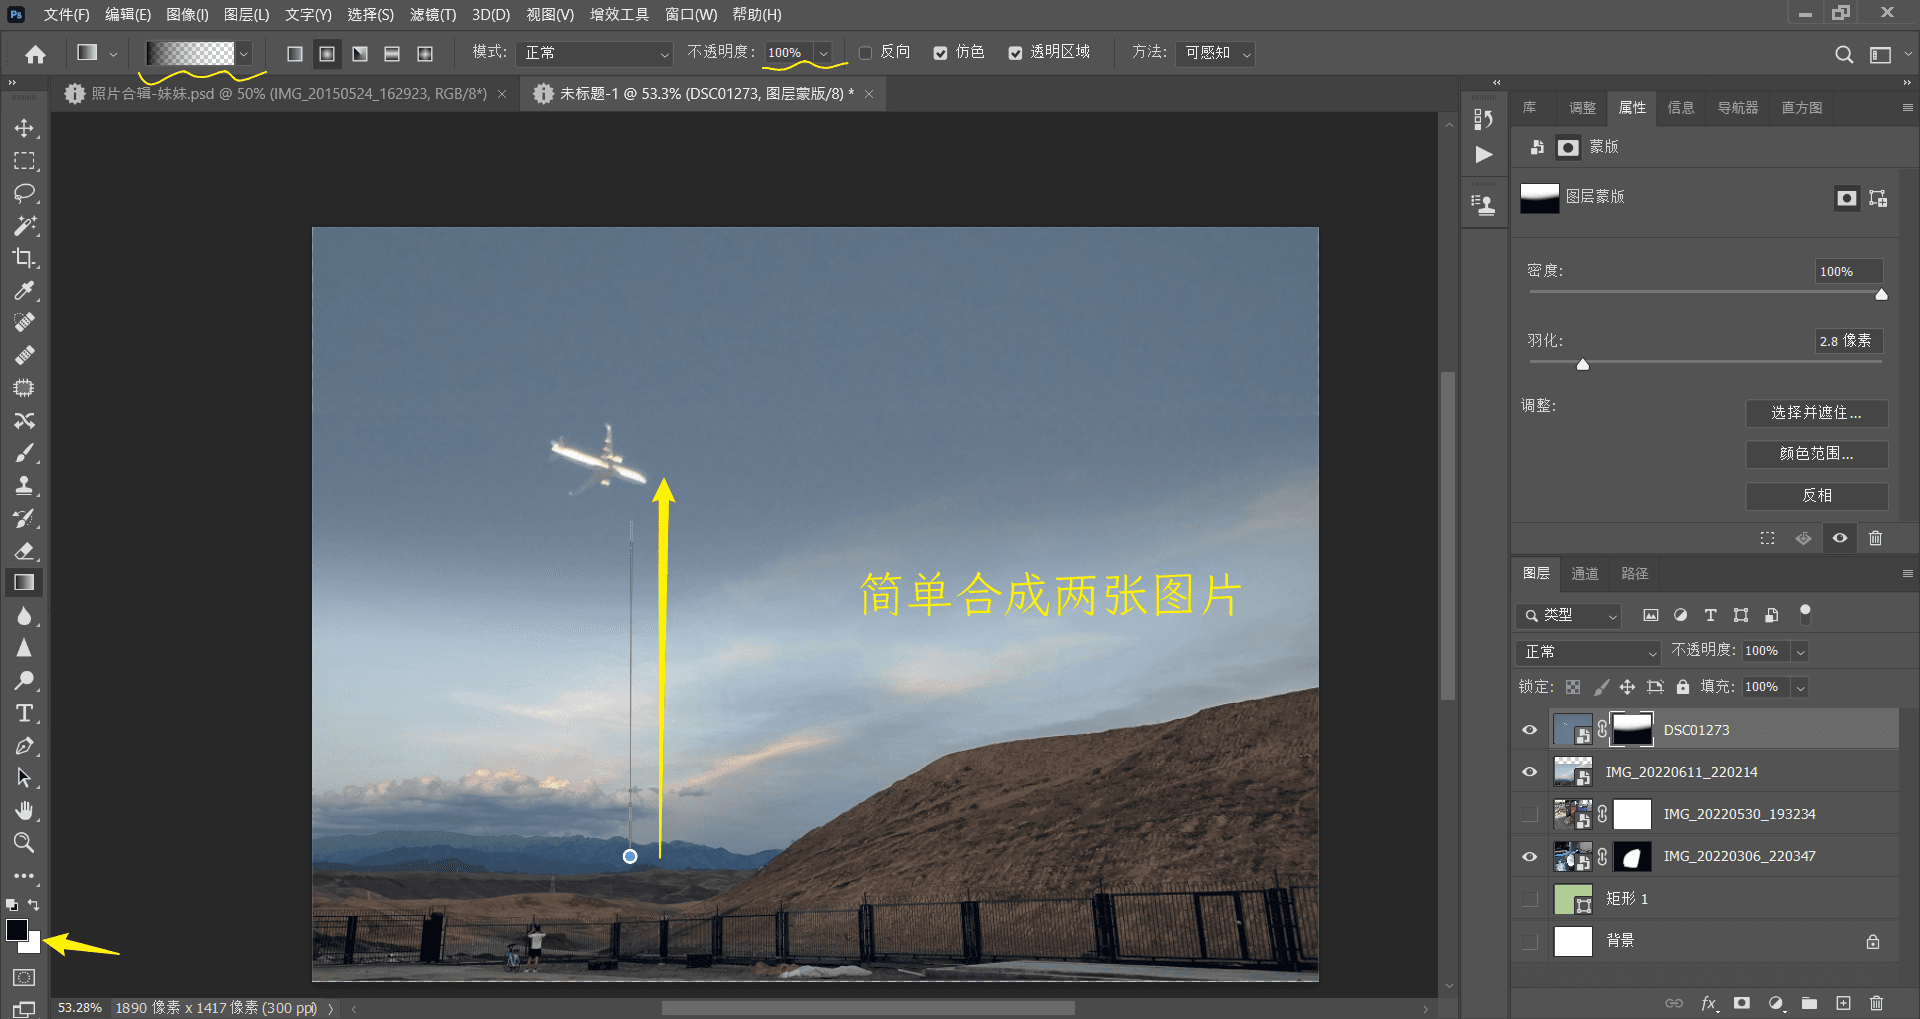
Brush Tool and Gradient Tool#
These two tools are very similar. The first step for both is to set the foreground color to black and the background color to white, and then create a new layer mask.
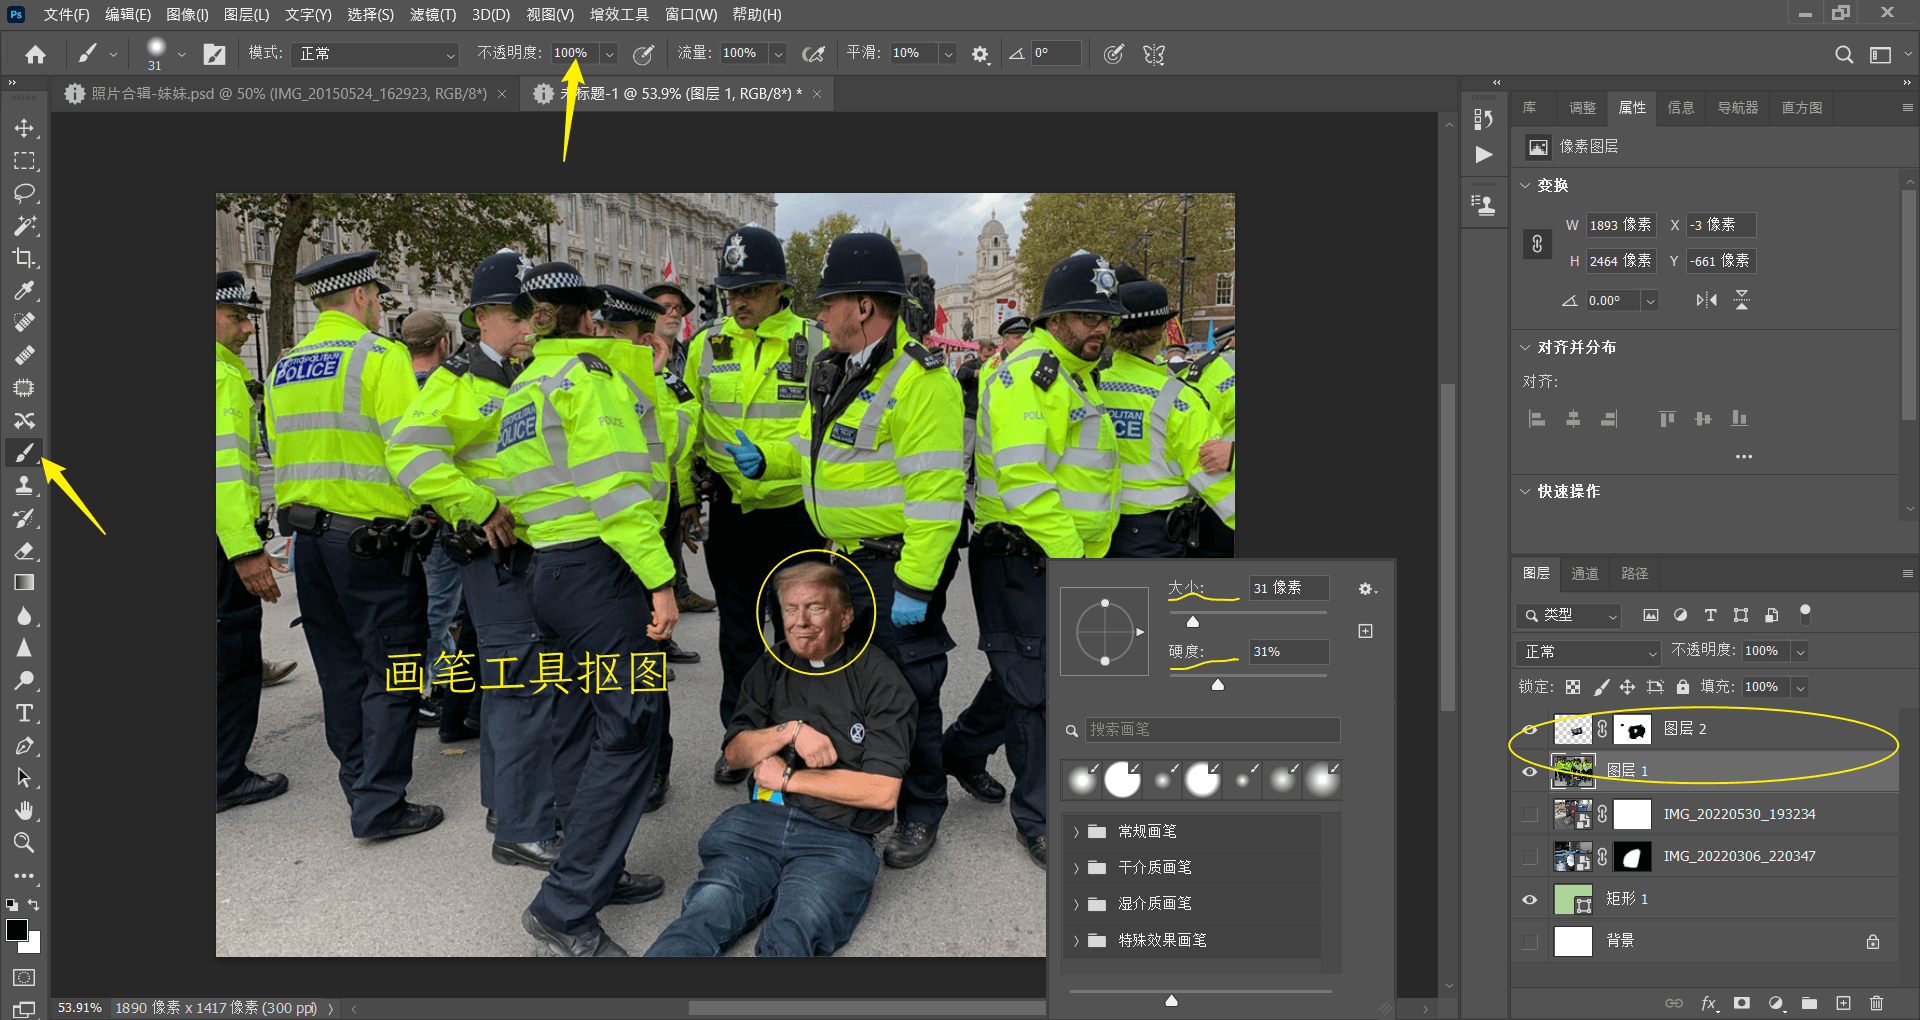
For the Brush tool, simply brush on the image.
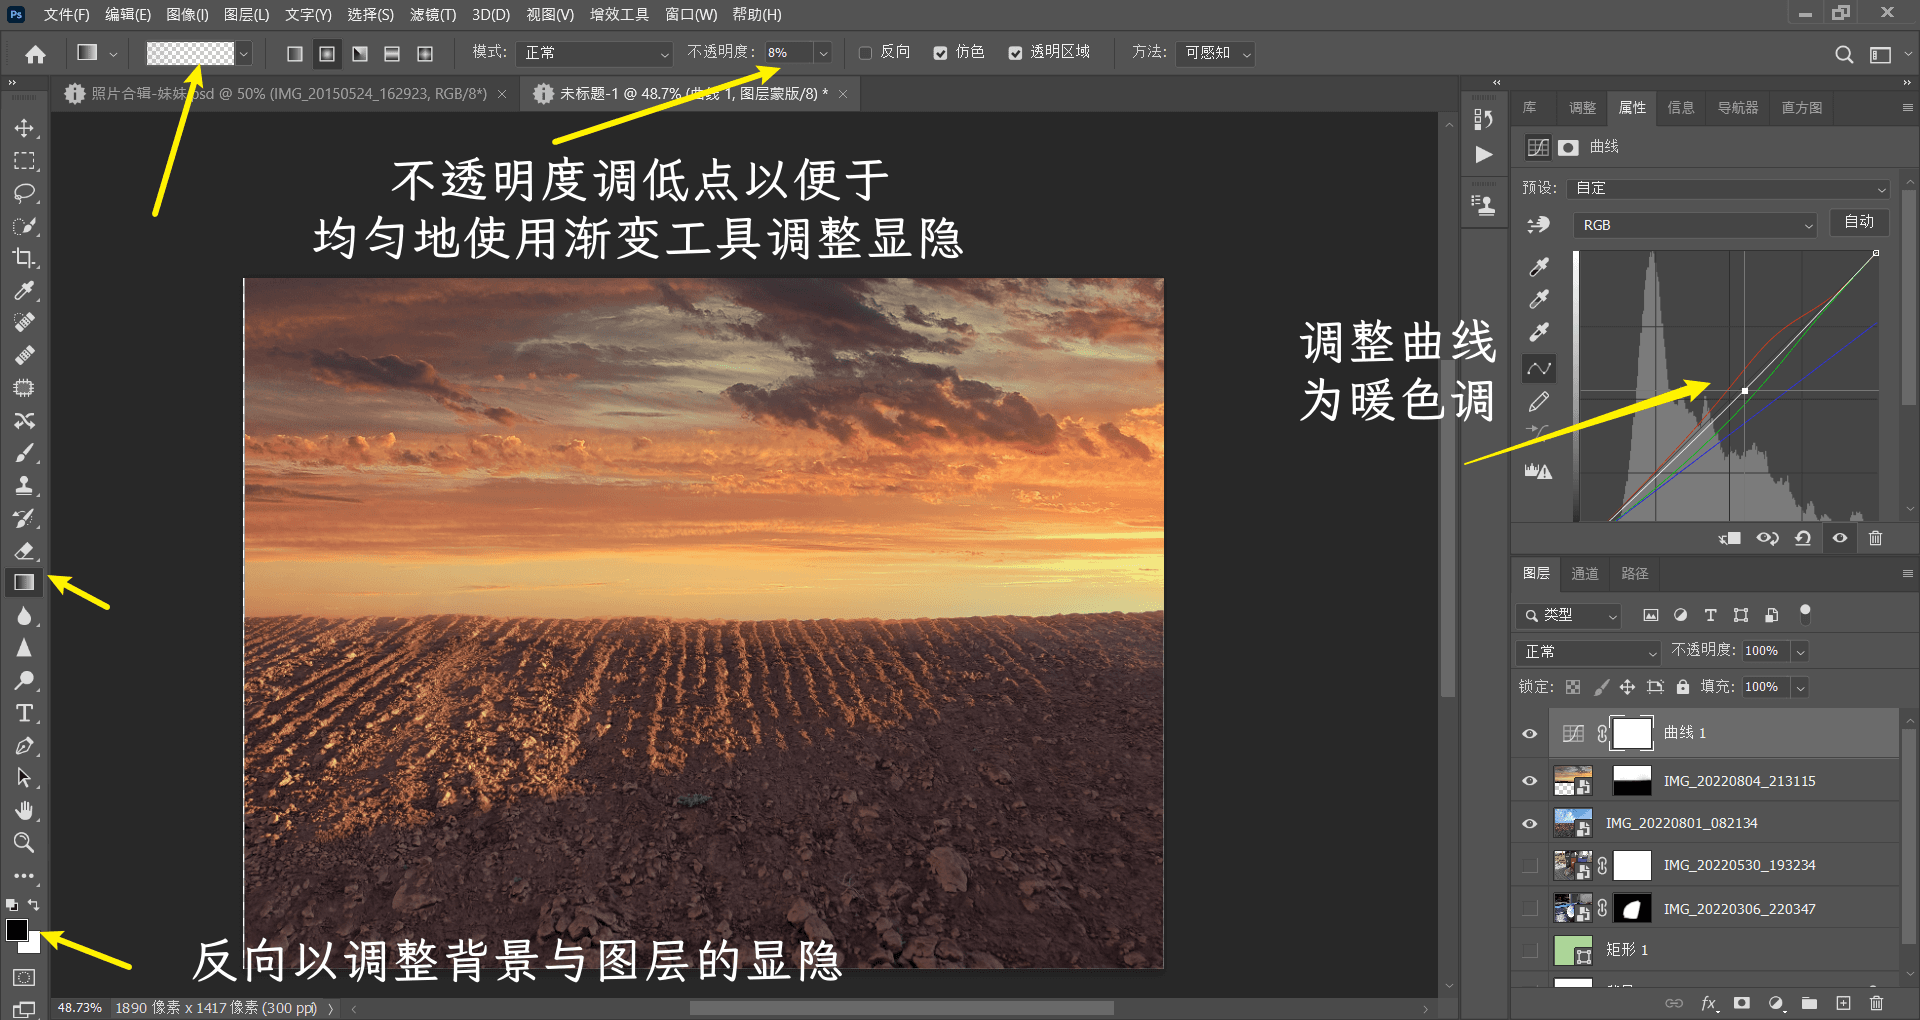
For the Gradient tool, select "Foreground to Transparent Gradient (left side is black, right side is transparent)", then choose different gradient styles and set the appropriate opacity. Finally, stretch the gradient on the image to display the "Background" layer.
{% note info simple %}
Using this method, we can quickly blend many images. However, during the composition process, attention must be paid to factors such as the angle of light and the perspective of the image. Only then can relatively realistic post-production works be created.
{% endnote %}
Simple Image Exercises#

Afterword: Guiding Pre-Shooting with Post-Processing Mindset#
Generally speaking, it is very difficult to directly capture a perfect image. It requires the right timing, location, and people to be in place (see this example Snow and Shot). It is extremely challenging to capture such an image in one shot, even for professional photographers. However, if post-processing is considered during photography, the situation can be greatly improved.
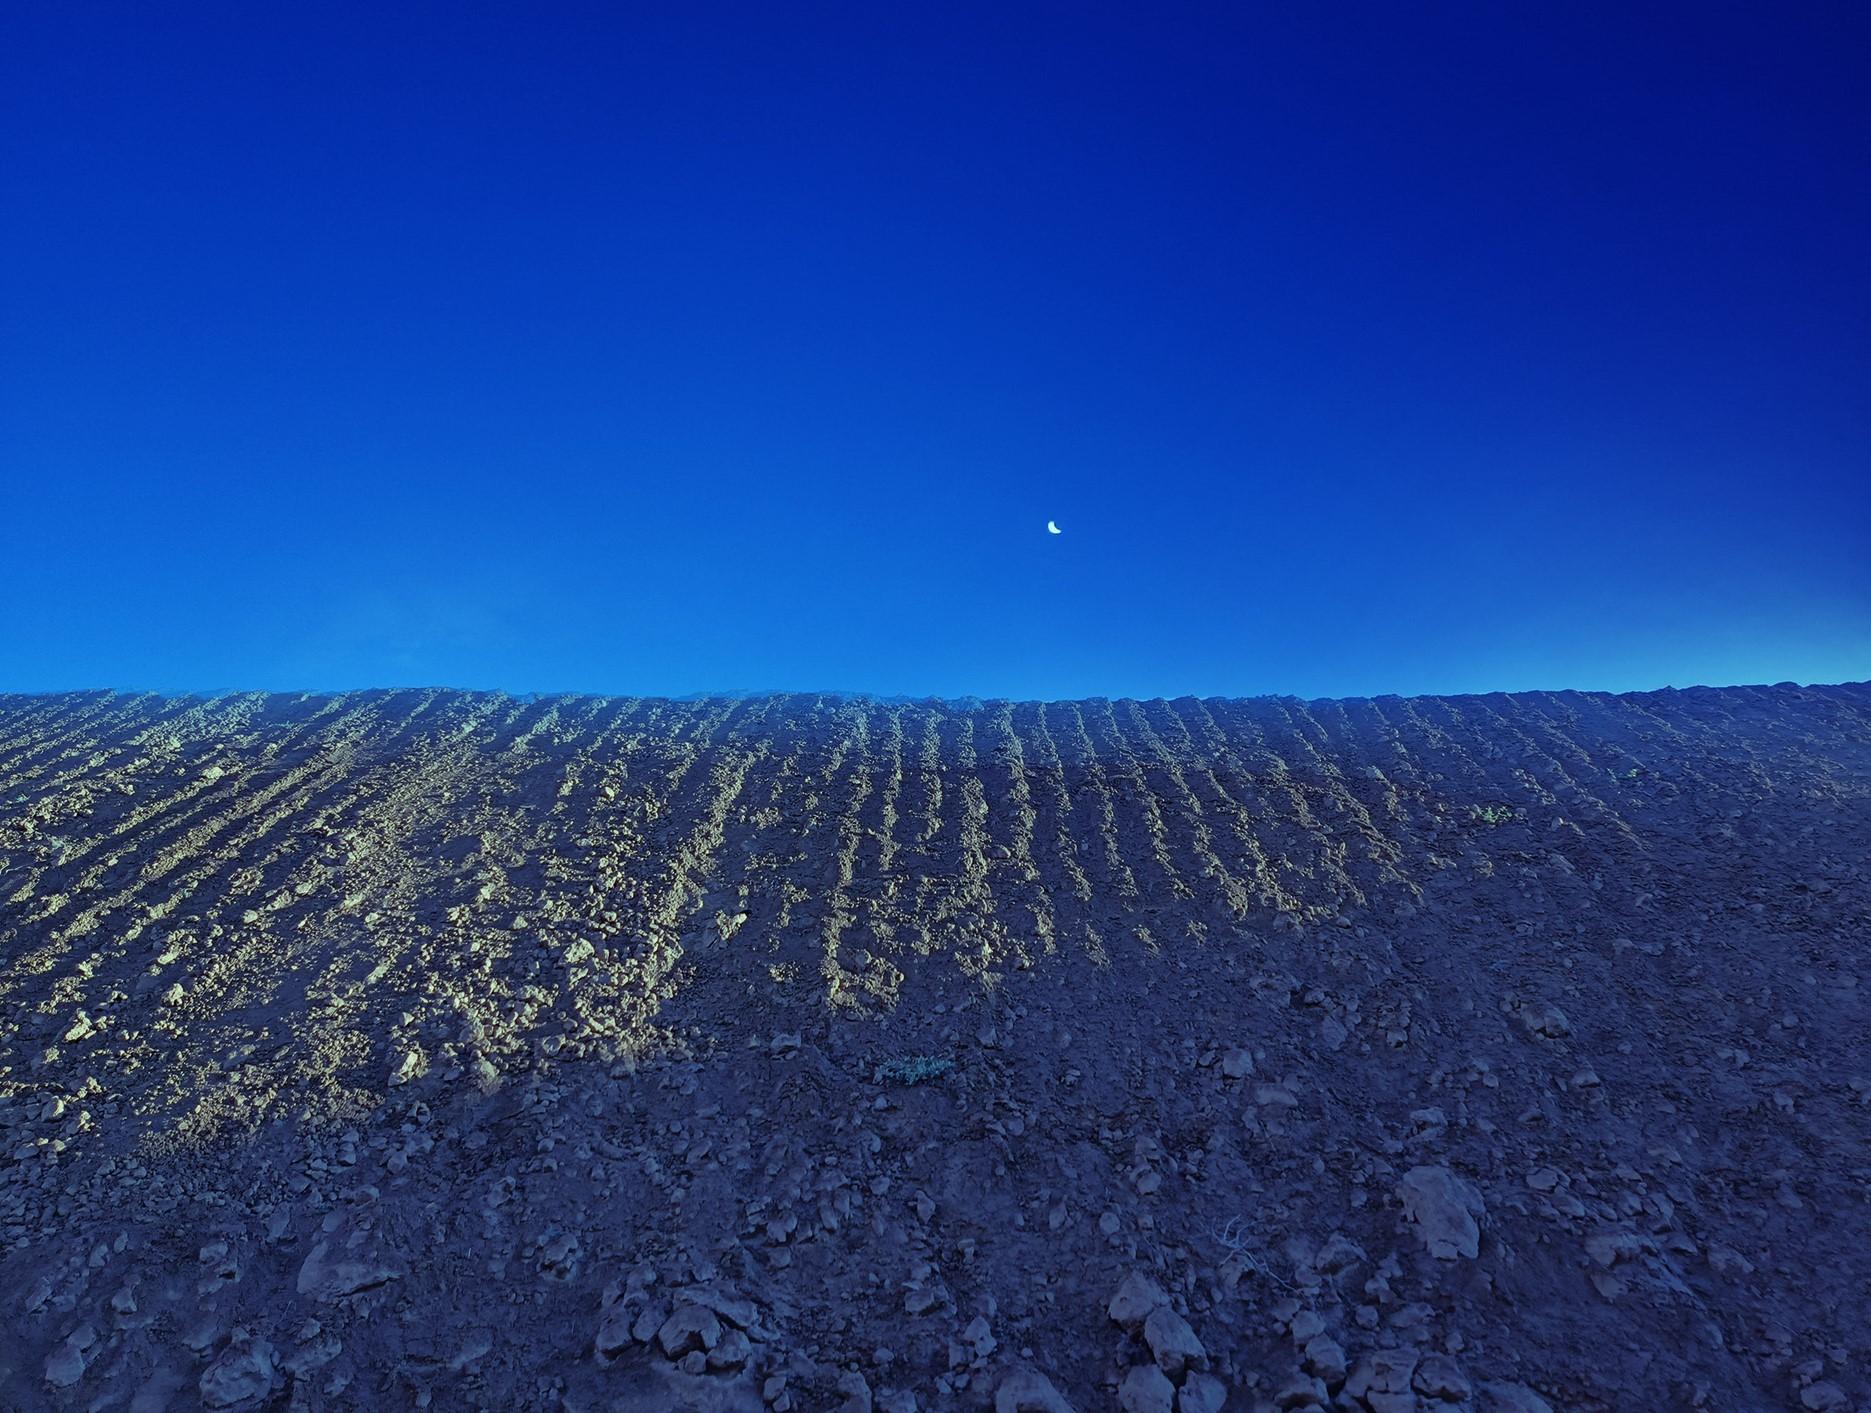
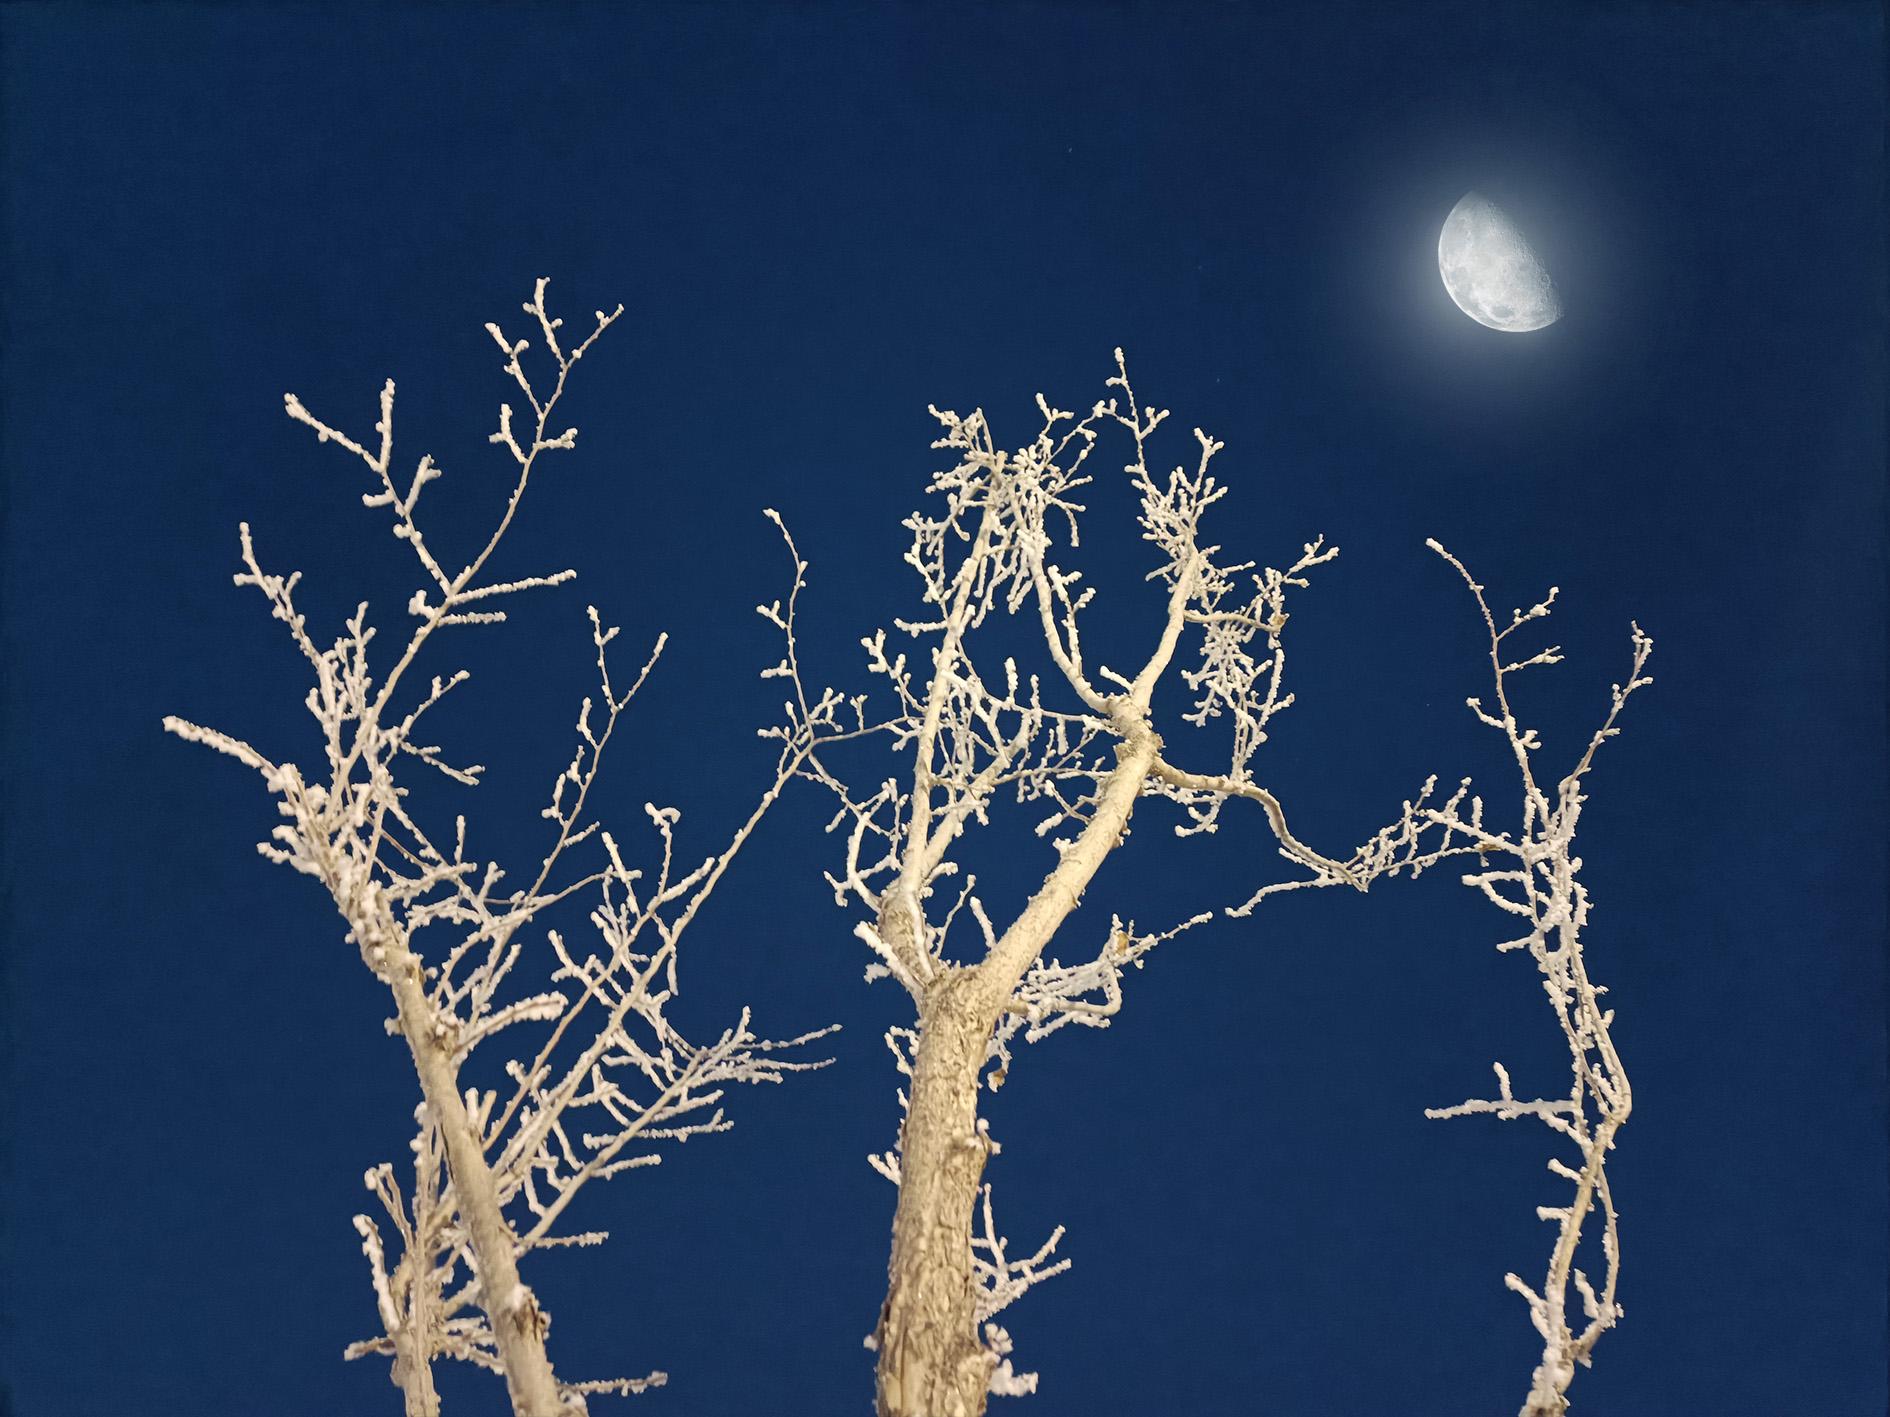
For example, there are two photos. The first photo has a subject but no background; the second photo has an environment but no subject. At first glance, both photos seem to be failures. But if you look closely, the environment is the same in both photos, and the lighting conditions are the same. The only difference is that these two images are not combined. For such a set of photos, post-processing techniques are very suitable for compensating for the shortcomings of pre-shooting.
By approaching photography with a mindset of creative thinking, this is called guiding pre-shooting with a post-processing mindset.
With the idea of secondary creation in mind, these two seemingly failed photos can be combined into one.